Create Virtual Machine
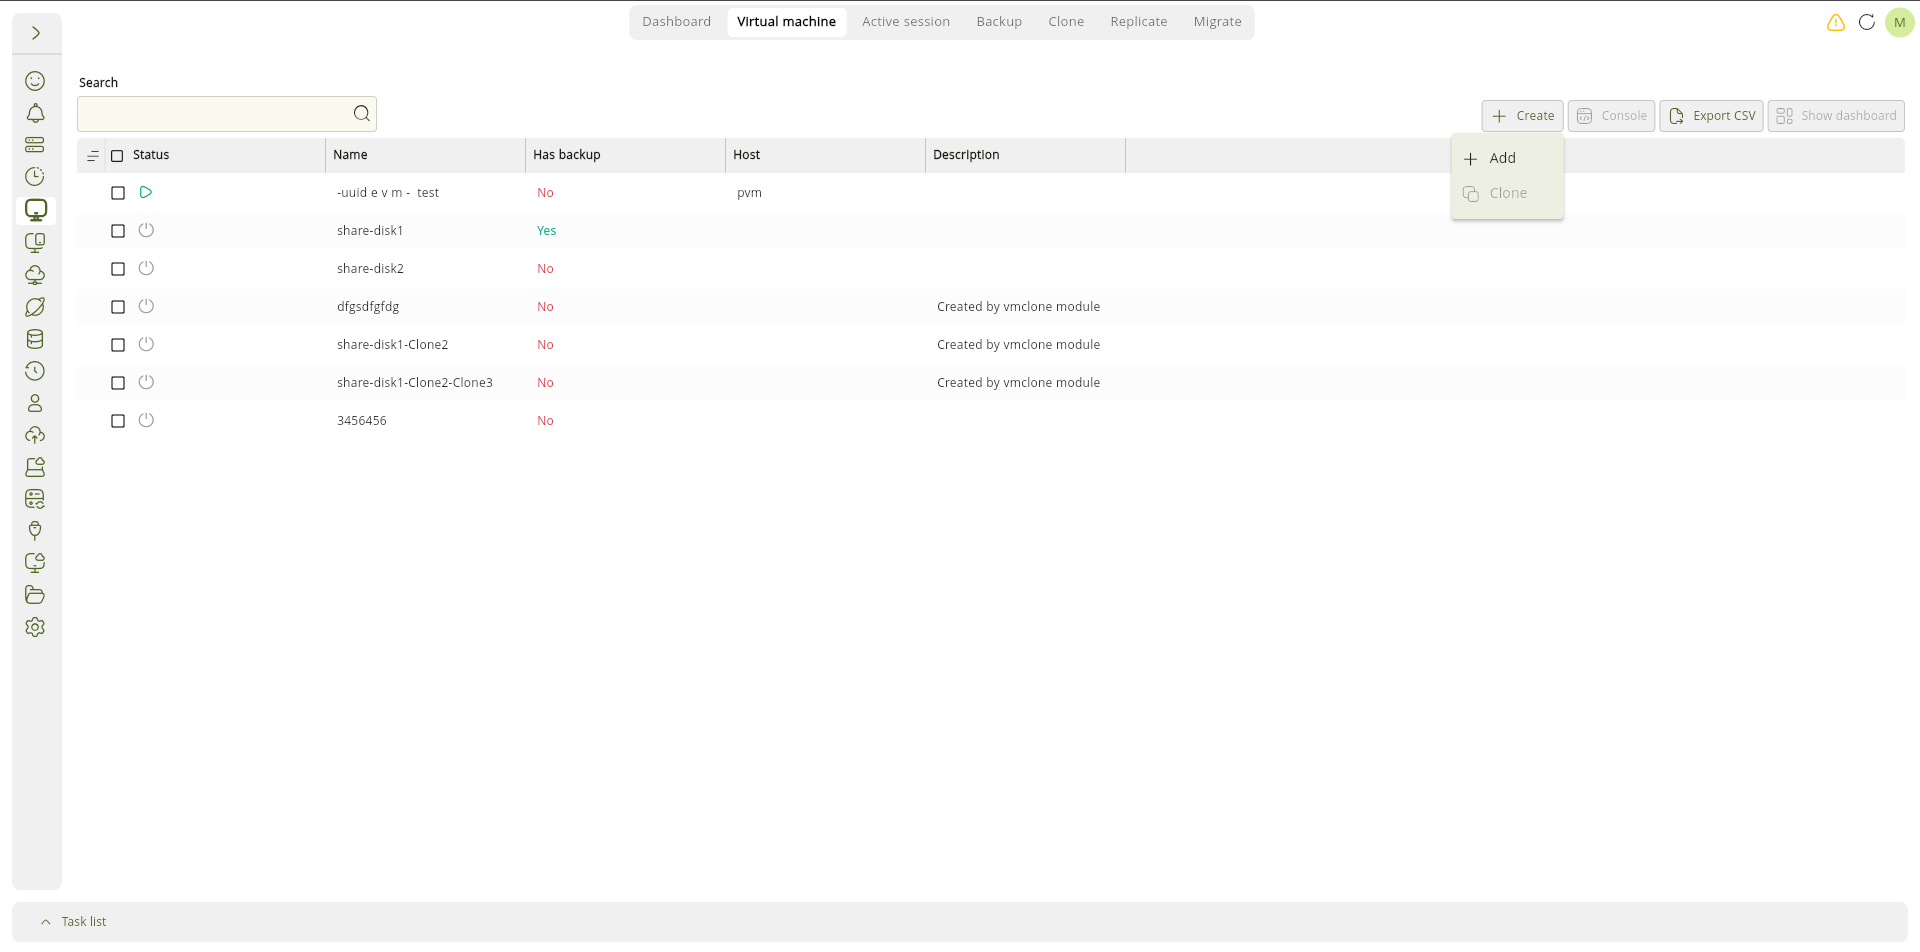
First, navigate to the Virtual Machine module, then click the Create button and select Add from the displayed menu.
General
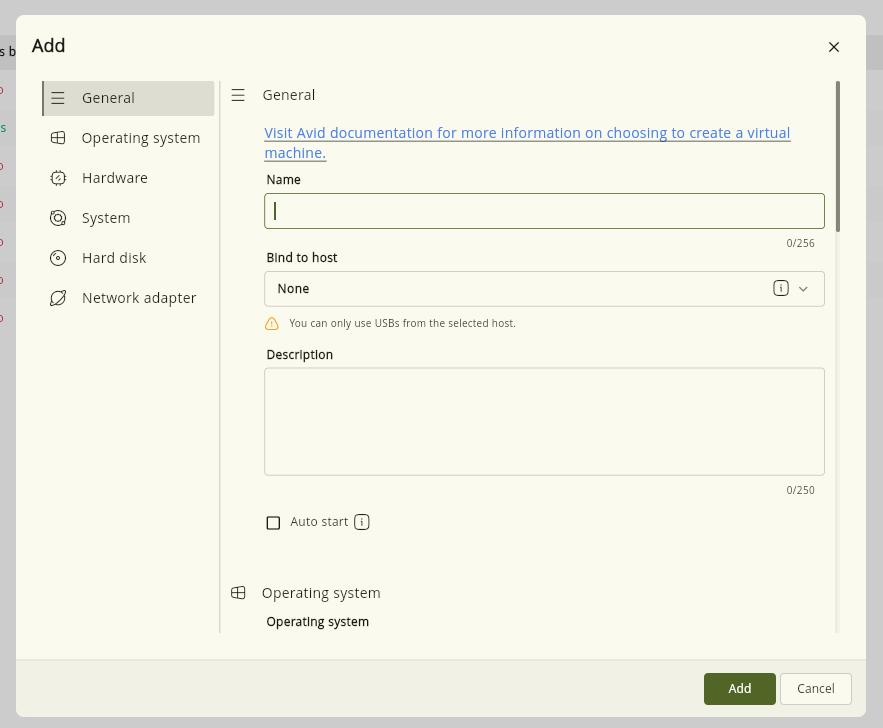
-
Name: Specifies the name of the virtual machine. It is recommended to choose a suitable name related to the virtual machine’s purpose.
-
Bind to host: This setting is used in a cluster. In a cluster, a virtual machine can be started on different hosts. If a virtual machine is bound to a specific host, it can only be started on that host. Binding may be required for various reasons, such as hardware locks, the hardware resources of a specific host, or other requirements. By selecting None, the virtual machine can be started manually or automatically on any host in the cluster.
If a virtual machine is bound to a specific host, only USB devices connected to that host, such as hardware locks, can be attached to the virtual machine.
-
Description: Provides a space to enter information and descriptions that may be useful to other administrators.
-
Auto Start: When enabled, the virtual machine starts automatically when PVM starts.
Operating System
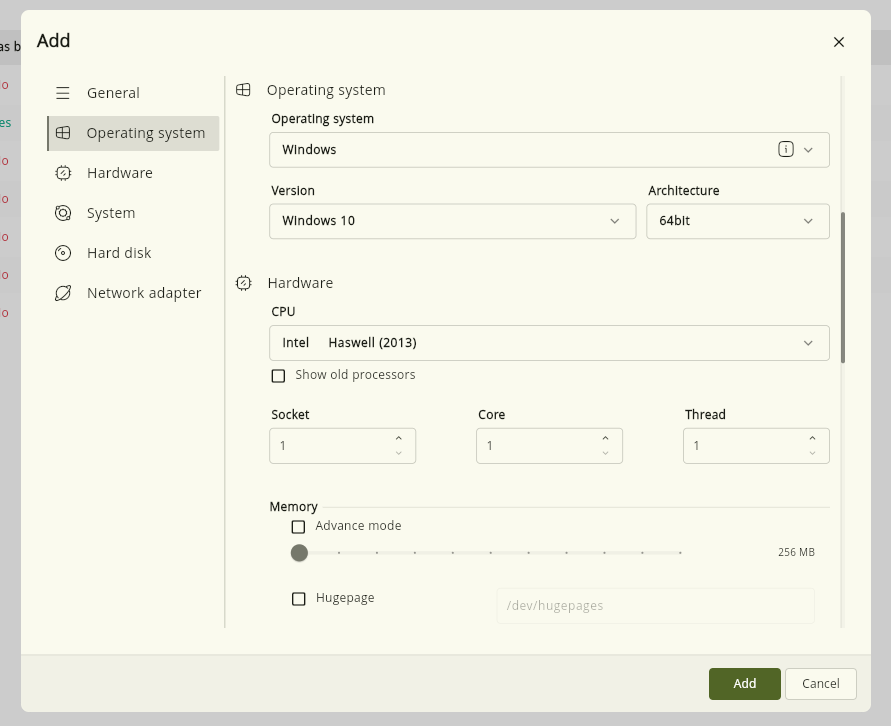
Selecting the correct operating system type, version, and architecture for the virtual machine helps improve its performance, optimize the use of server resources such as RAM and CPU, and provide greater stability.
-
Operating System: Specifies the operating system family to be installed on the virtual machine, such as Windows or Linux.
-
Version: Specifies the version or edition of the selected operating system.
-
Architecture: Specifies the processor architecture of the operating system, such as 32-bit (x86) or 64-bit (x86_64).
Hardware
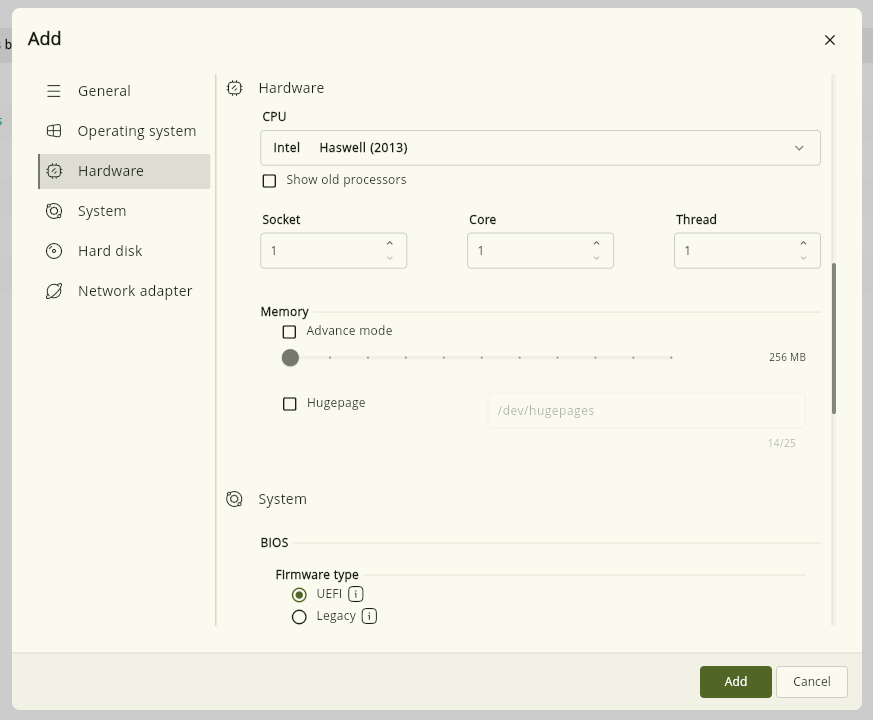
-
CPU Types: Specifies the processor model that will be emulated for the virtual machine. In other words, the virtual machine can use a processor model that does not necessarily match the physical processor of the host server.
The Host processor option represents the physical processor of the server and provides the highest possible performance to the virtual machine.
Although using the Host processor provides maximum performance, it may introduce limitations when migrating the virtual machine between physical servers:
- If the processor types of the source and destination servers are different, the virtual machine's operating system may need to adapt to changes in the available processor features.
- In rare cases, these differences may cause problems for the virtual machine.
The advantages of using emulated processor types include:
- Migration is possible in a clustered environment.
- The virtual machine can be moved from one site to another or from one server to another with minimal side effects.
If the virtualization infrastructure uses a single server, or maximum processor performance is required, selecting the Host processor is recommended. However, when portability or migration is required, using an emulated processor type is more suitable.
-
Show old processors: When enabled, older processor models are added to the list. This option can be used for older operating systems such as Windows XP or DOS to select a compatible processor model for the virtual machine.
-
Socket(s): Specifies the number of virtual physical processors assigned to the virtual machine.
-
Core(s): Specifies the number of cores assigned to each virtual processor.
The total processing capacity available to the virtual machine is determined by multiplying the number of physical processors by the number of cores.
The number of physical processors should be selected according to the capabilities of the virtual machine's operating system, as some operating systems support only a specific number of processors.
The processing capacity assigned to a virtual machine is shared. This does not mean that the entire processing capacity is permanently and exclusively allocated to the virtual machine. It means that the virtual machine can use up to this amount of processing capacity when required.
The required processing capacity should be evaluated based on the virtual machine's workload and compared with the total number of processor threads available on the host server to determine the maximum processing capacity required by the virtual machine.
-
Memory: Specifies the amount of RAM allocated to the virtual machine. The allocated memory is used by the virtual machine's operating system and applications. The amount should be selected based on the operating system and workload requirements of the virtual machine.
-
HugePage: Enables the use of HugePage for the virtual machine's memory. HugePage can reduce memory management overhead and improve memory access performance, particularly for virtual machines with high memory requirements.
Enabling HugePage requires sufficient HugePage memory to be available on the host server.
System
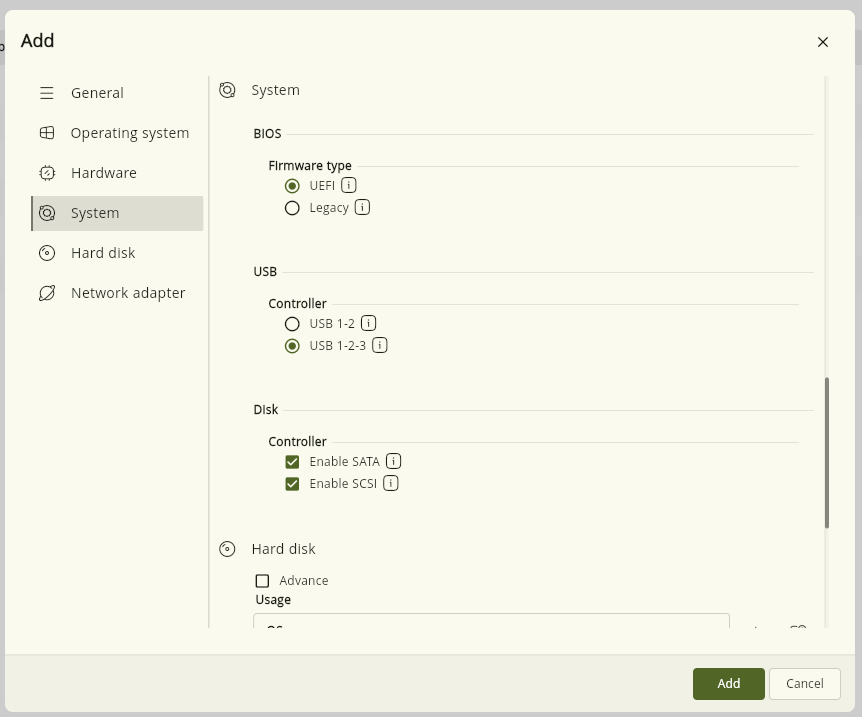
BIOS Settings
-
Type: Specifies the boot firmware used by the virtual machine.
-
Legacy: A traditional BIOS system that uses the older MBR standard for disk partitioning.
-
UEFI: A modern boot firmware supported by newer operating systems. It provides more advanced features, improved security, and faster boot times compared to traditional BIOS. UEFI uses the newer GPT standard for disk partitioning.
When Legacy is selected, the boot order can be configured. The following boot devices can be selected:
- None
- CD-ROM
- Disk
- Network
When the virtual machine is started for the first time, it boots from the CD-ROM.
USB Controller
Specifies the USB controller used for USB devices such as hardware locks, printers, and flash drives that are connected to the virtual machine through different methods, such as USB redirection, virtual flash drives, or SAIOD.
-
USB 2: Supported by all operating systems and provides 6 USB ports to the virtual machine. This controller also supports USB 1 devices.
-
USB 3: Provides an average speed approximately 5 times higher than the previous generation and provides 15 USB ports to the virtual machine. This controller supports USB 1 and USB 2 devices. USB 3 is not supported by operating systems released before 2010, such as Windows 7 or Linux kernel 2.5.
Disk Controller
Disk I/O is one of the most important factors affecting the performance and efficiency of a virtual machine. PVM supports four types of disk controllers: IDE, SATA, SCSI, and Virtio.
By default, all four controllers are enabled. If required, the SATA and SCSI controllers can be disabled.
Hard Disk
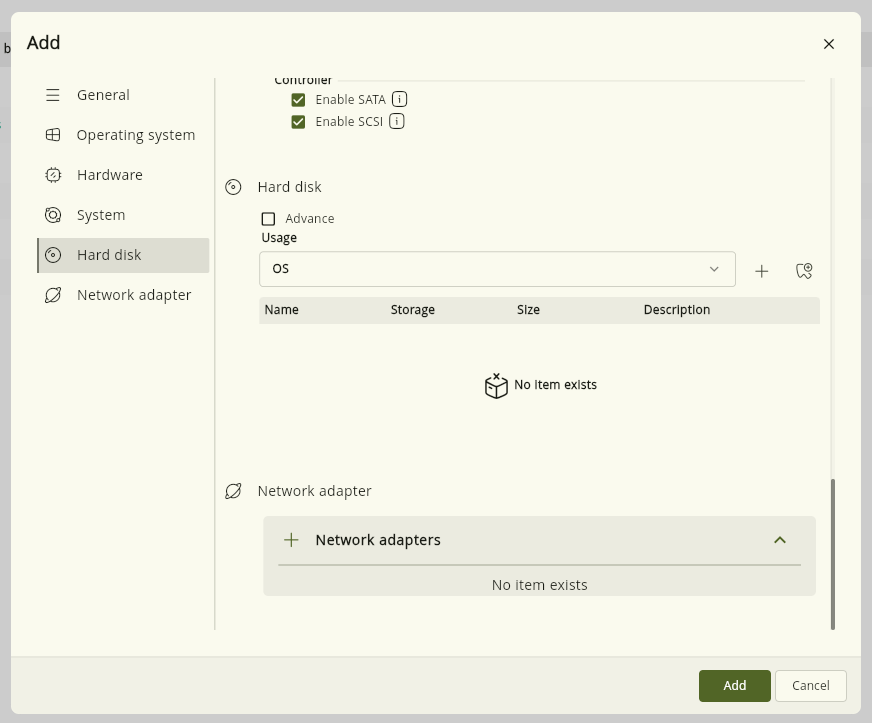
This section is used to define the virtual disks required by the virtual machine.
- Controller: Specifies the type of controller used to connect the disk to the virtual machine. In terms of performance, the controllers are generally ordered from lower to higher performance as IDE, SATA, Virtio, and SCSI. The SCSI controller provides optimized performance.
The Virtio and SCSI controllers require additional drivers when used with Windows operating systems. Therefore, during the Windows installation process, it is recommended to initially use the SATA controller, which is supported by all operating systems. After the operating system installation is complete, the controller can be changed and the required drivers can be installed.
-
For operating systems that do not support SATA, the IDE controller should be used.
-
Linux operating systems can use Virtio and SCSI controllers during installation.
Controller types:
- SATA: A relatively new and fast controller that supports up to 6 disks. It does not support hot-plug.
- SCSI: A high-performance controller that supports up to 32 disks. It supports hot-plug but requires additional drivers for Windows operating systems.
- Virtio: A high-performance virtual controller that supports up to 16 disks. It supports hot-plug but requires additional drivers for Windows operating systems.
- IDE: An older and slower controller that supports up to 4 disks. It does not support hot-plug.
-
Media: Specifies the type of disk.
- Disk: A disk used by the virtual machine for data storage.
- CD-ROM: An ISO image that has already been added to the selected storage and is presented to the virtual machine as a CD/DVD.
-
Storage: Specifies the storage location from which disks are selected or where new disks are created. This option displays a list of available storages based on the selected media type.
-
Select Disk: Displays all available disks on the selected storage. If a new disk needs to be created for the virtual machine, select New Disk.
-
Name: Specifies the desired name for the virtual machine disk. It is recommended to choose a name that indicates the type or purpose of the disk content.
-
Slot: Specifies the disk slot on the selected controller. If the value is set to -1, PVM automatically assigns the appropriate slot.
-
Size: Specifies the disk size in gigabytes. The disk size can be increased later if required, but it cannot be reduced in order to protect the stored data.
-
Disk Format: Specifies the format of the virtual machine disk.
- qcow2: Supports features such as compression, encryption, and optimized replication due to its use of metadata.
- raw: Provides a simple disk format without metadata or additional features.
It is recommended to use the qcow2 format for virtual machine disks.
-
Description: Provides additional information or a description for the virtual machine disk.
Recommended Disk Configuration
The following disk configuration is recommended when creating a virtual machine:
- Create one virtual disk for the operating system.
- Create one virtual disk for data.
- If required, create a third virtual disk for backup, particularly when an application inside the virtual machine requires dedicated space for application-level backups.
For the first disk (Operating System), set Media to Disk. Select the desired storage from the available data storages. To create a new disk, select New Disk and specify its Name, Slot, Size, and Disk Format.
The second disk (Data) and, if required, the third disk (Backup) are created in the same way.
Operating System Installation
After defining the operating system, data, and optional backup disks, an ISO image or CD containing the desired operating system is required for installation.
To add the operating system ISO:
- Set Media to CD-ROM.
- Select the desired Storage.
- Select the required ISO file from the list of available disks.
- Note 1: The order of the rows from top to bottom determines the boot order of the disks in the virtual machine. The first row has the highest boot priority.
- Note 2: During the first startup of the virtual machine, the CD-ROM has the highest boot priority.
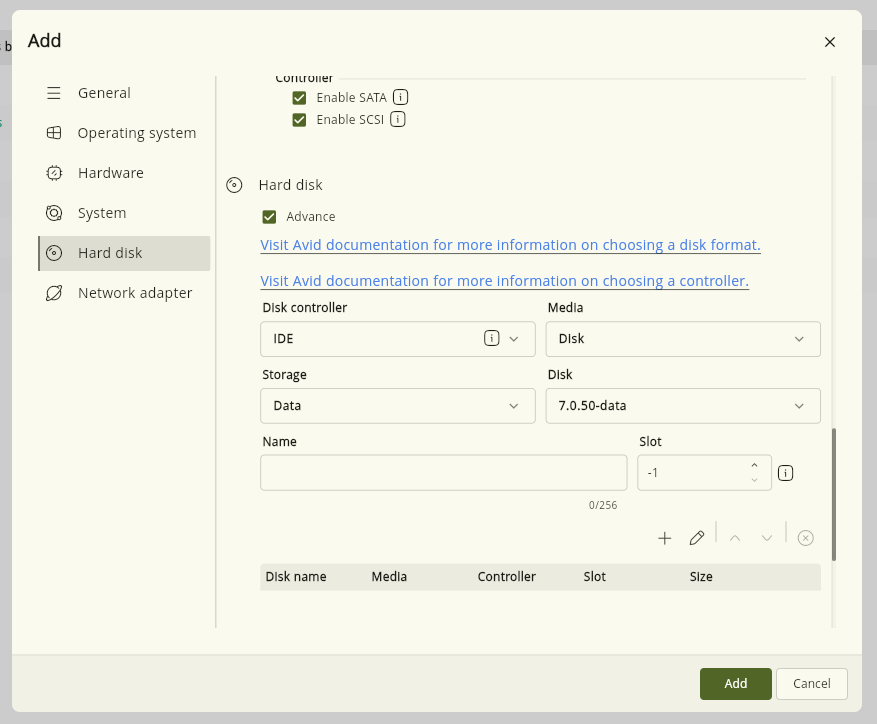
When creating a virtual machine disk, PVM provides a Simple Mode for faster disk creation. By enabling Simple Mode, a disk is created automatically using the default disk settings, without requiring the user to configure each disk option manually.
If a CD-ROM is required, click the button next to Add and select CD-ROM. The required ISO image can then be selected from the available storage.
Network Adapter
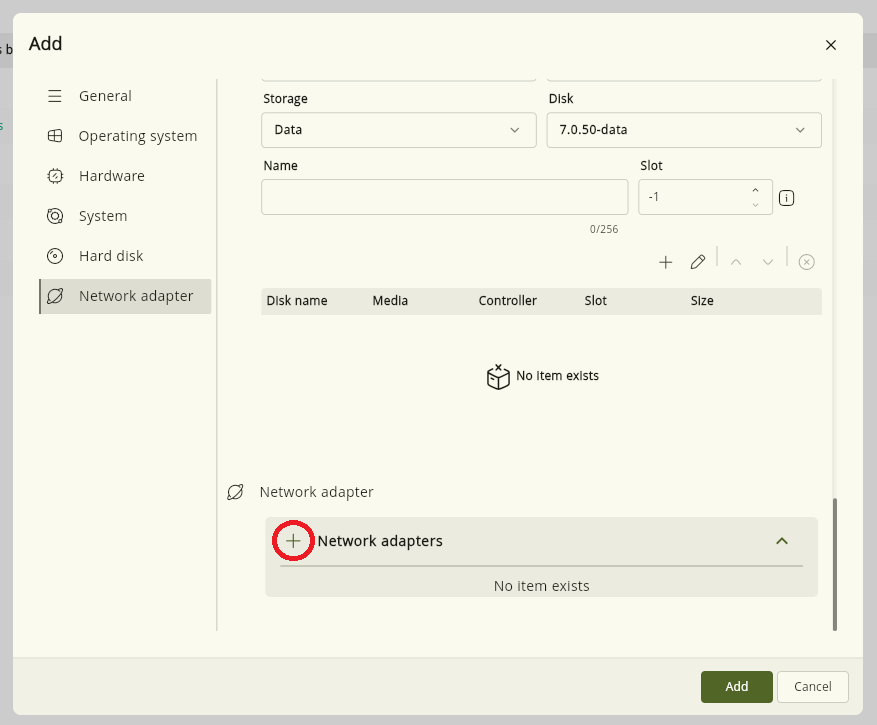
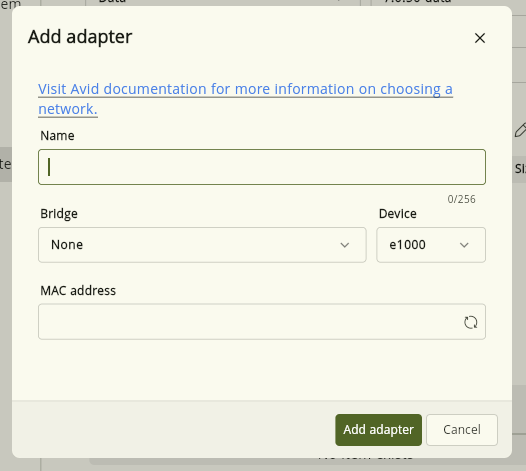
A network card must be configured for the virtual machine to communicate with external networks and other systems.
-
Name: Specifies the name of the network card. It is recommended to use a name that indicates the purpose or type of traffic handled by the network card.
-
Virtual Switch: Different virtual switches may be available depending on the configured networks. This option specifies which virtual switch the network card should be connected to. Selecting None means that the network card is not connected to a virtual switch and therefore cannot send or receive network traffic.
-
Device: Specifies the type of virtual network adapter.
- rtl8139: A Realtek network adapter with a maximum speed of 100 Mb/s. It can be used with older operating systems.
- e1000: An Intel network adapter with a maximum speed of 1 Gb/s.
- Virtio: A high-performance virtual network adapter with a maximum speed of 10 Gb/s.
The rtl8139 and e1000 network adapters are supported by most operating systems without requiring additional drivers. However, the Virtio network adapter requires a driver to be installed on Windows.
During Windows installation, if network connectivity is required, it is recommended to use e1000 or rtl8139. Otherwise, and especially when installing Linux operating systems, using Virtio is strongly recommended.
If e1000 or rtl8139 is used during the operating system installation, it is recommended to change the network adapter type to Virtio after the installation is complete and install the required driver if necessary.
-
MAC Address: Specifies the physical MAC address of the network card. If a specific MAC address is required, it can be entered manually. If this field is left empty, a MAC address is generated automatically.
-
At the end of the configuration, after completing all the required settings, click the Add button to create the virtual machine.