Storage Management
In the Storage section, you can create, view, and manage the storage spaces used in the system.
Each storage is defined based on the type of content it stores and the file system type or access method used for it.
To access this section, open Storage from the sidebar.
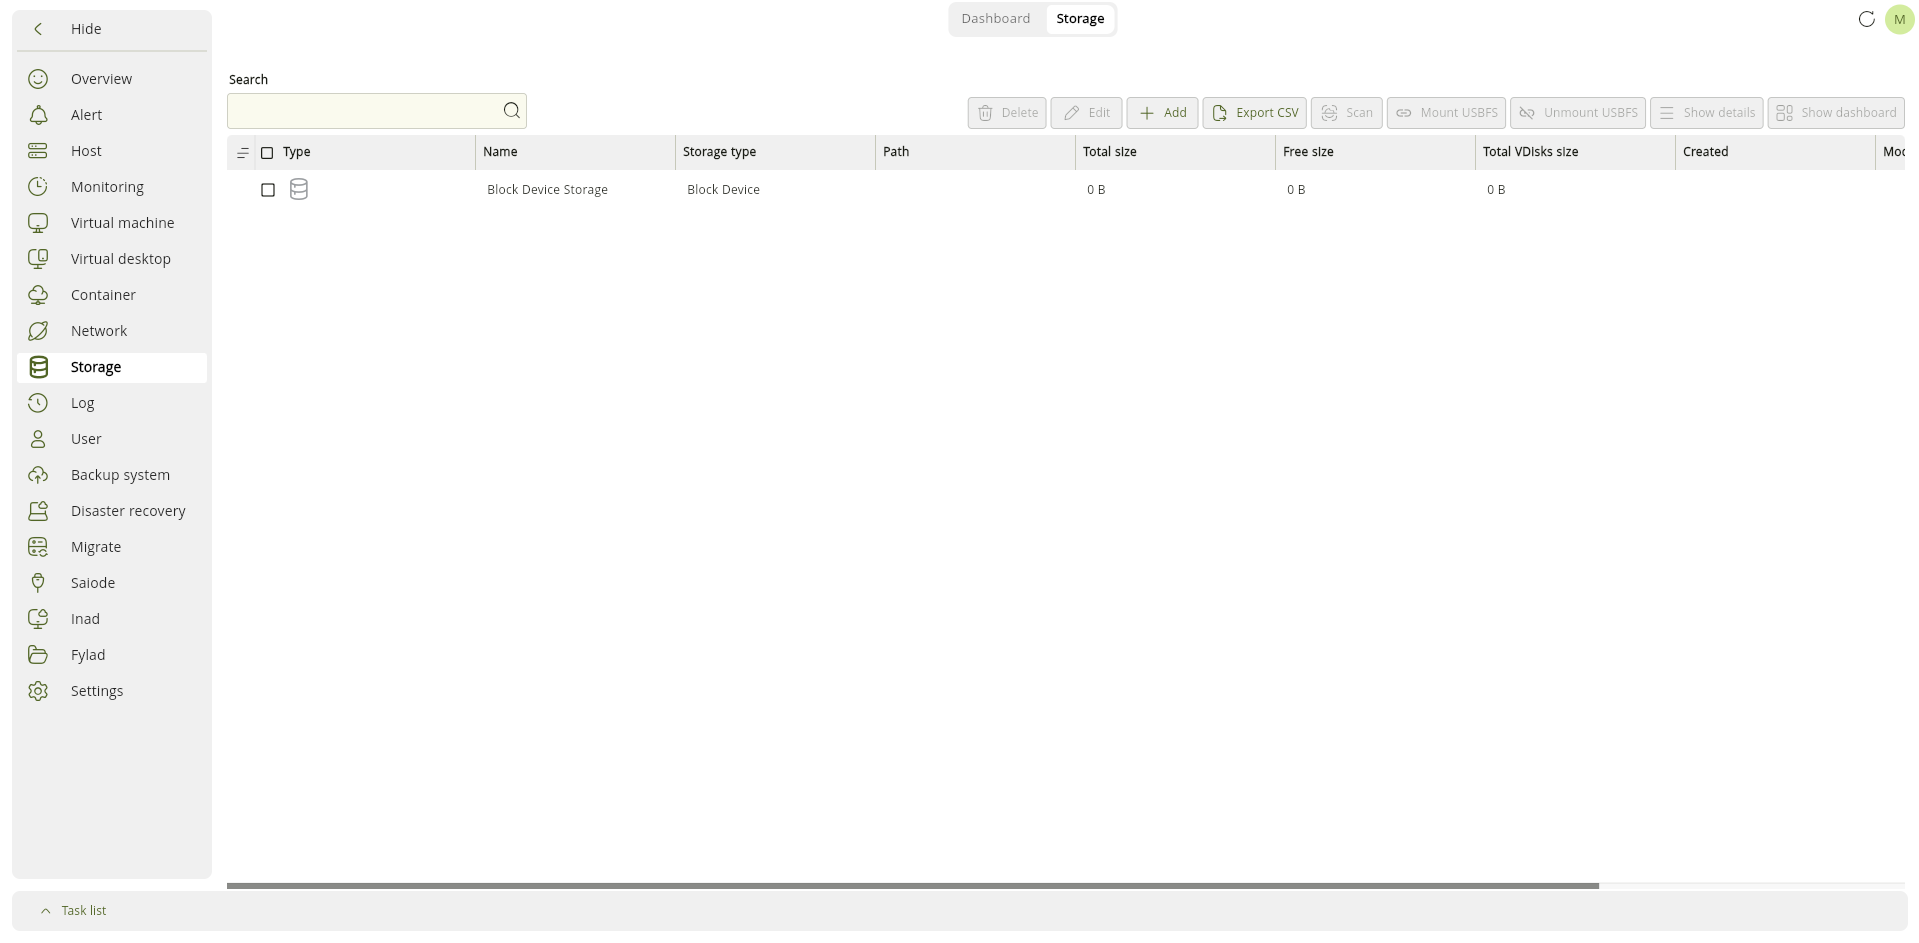
This page displays information about the available storage spaces.
The toolbar at the top of the page allows you to perform various operations such as adding a new storage, editing, deleting, and more.
Add New Storage
To create a new storage, click the Add button.
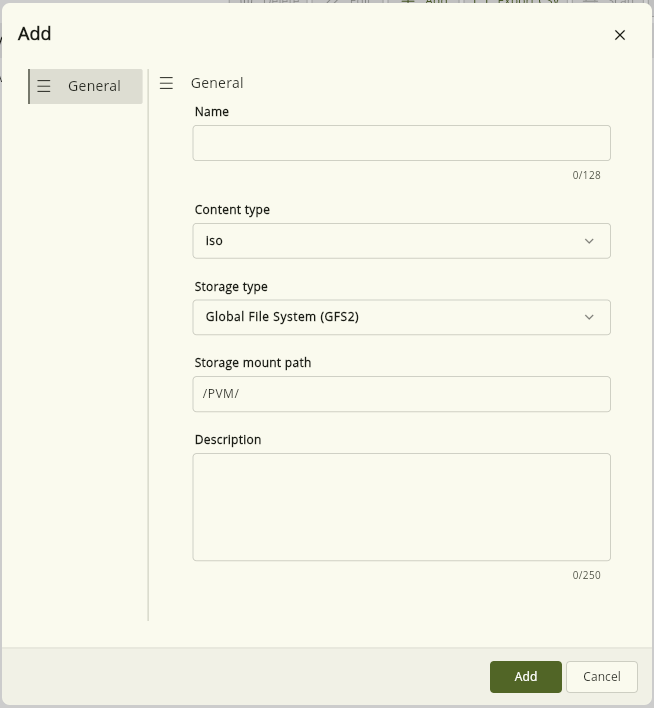
In the opened window, enter the storage information in the General section.
-
Name : Specifies the name of the storage.
-
Content type : Specifies what type of content will be stored in the storage.
-
Storage type : Specifies the storage method or access method used by the storage.
-
Storage mount path : Specifies the mount path used for connecting the storage.
-
Description : Specifies optional information about the storage.
Available configuration fields may change depending on the selected Storage type.
After completing the settings, click Add.
Content Type
The Content type option specifies what type of information will be stored in the storage.
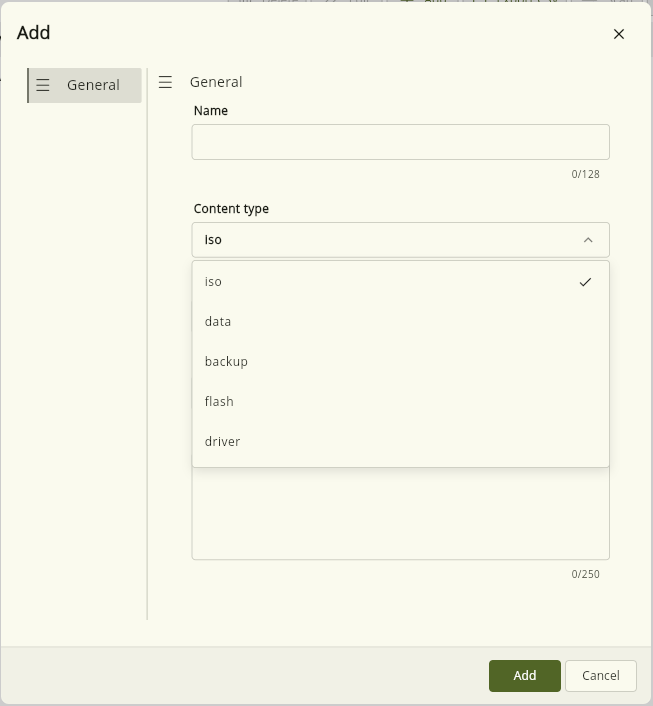
ISO
Used for storing ISO files.
These files usually contain operating system images, bootable tools, or other files that can be used as virtual CD/DVD media.
Data
Used for storing the main system data.
This storage type can be used to store virtual disks and other data that requires permanent storage space.
Backup
Used for storing backup files.
This storage can be used to store backup versions created from different system resources.
Flash
Used for storing data related to virtual flashes.
A virtual flash is a file-based storage space that can be used by the system for storing or managing files.
Driver
Used for storing driver files.
This storage can be used to store drivers required during operating system installation or configuration.
Storage Type
The Storage type option specifies the file system type or access method used by the storage.
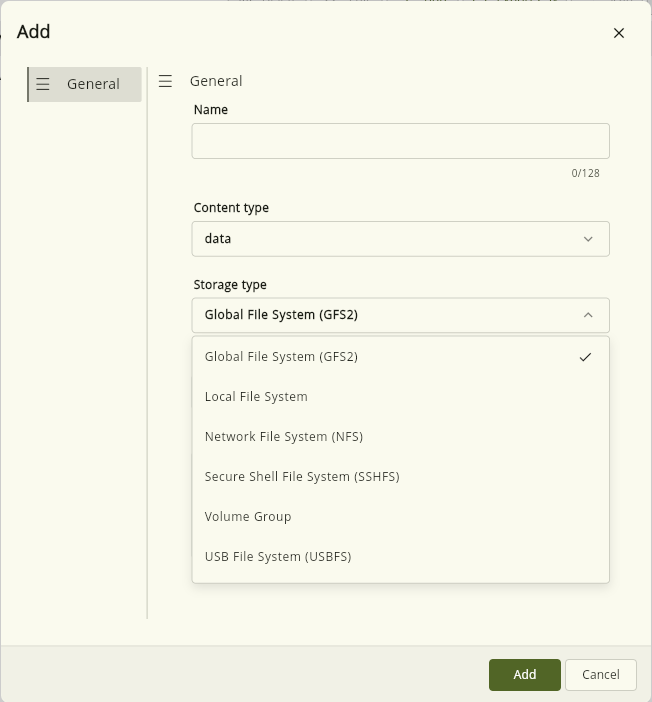
Global File System (GFS2)
GFS2 is a shared file system designed to allow multiple Nodes to access a shared storage simultaneously.
This type of storage is commonly used in cluster environments where multiple Nodes need access to a shared storage space.
GFS2 is suitable for storage spaces that need to be available at the cluster level.
Local File System
Local File System is used for storage located on the same Node or Server.
In this mode, the storage is placed on the local file system of the system and access to it depends on the same Node.
This type of storage is suitable for data that does not need to be shared between multiple Nodes.
Network File System (NFS)
NFS is used to access shared storage through the network.
In this mode, the storage is located on an NFS Server and is made available to the system through the network.
This method is suitable for environments where a central storage is shared between multiple Nodes.
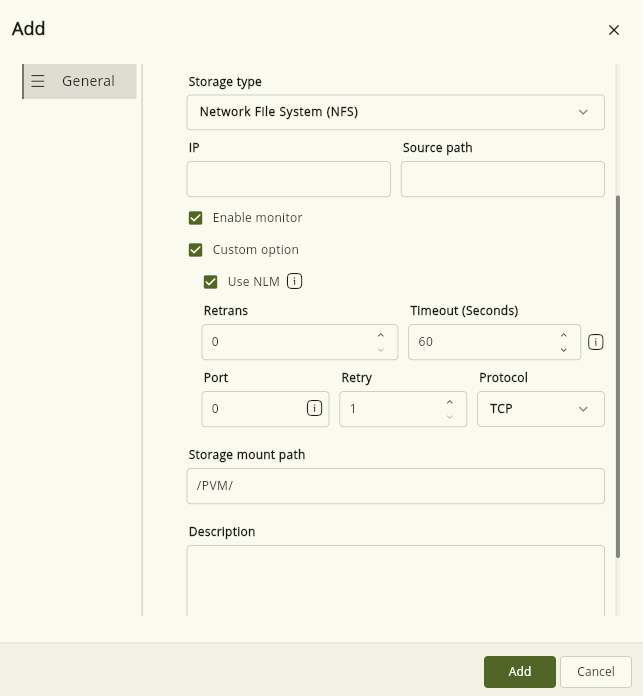
After selecting Network File System (NFS), the related connection and configuration fields are displayed.
-
IP : Specifies the IP address of the NFS Server.
-
Source path : Specifies the mount path on the NFS Server.
-
Enable monitor : When enabled, the system attempts to re-establish the storage connection if it is disconnected.
-
Custom option : Allows entering custom options for mounting NFS.
-
Use NLM : On older NFS versions, enabling this option can help prevent potential file-locking related errors.
-
Retrans : Specifies the delay between retry attempts for connecting to the NFS Server.
-
Timeout (Seconds) : Specifies the waiting time for receiving a response from the NFS Server.
-
Port : Specifies the port used for connecting to the NFS service.
-
Retry : Specifies the number of retry attempts if the connection fails.
-
Protocol : Specifies the communication protocol used for connecting to the NFS Server.
Port, protocol, and mount option values must match the NFS Server configuration.
Secure Shell File System (SSHFS)
SSHFS allows connecting a remote file system through the SSH protocol.
In this method, files are accessed through an SSH connection.
This type of storage is commonly used for accessing storage available on a remote server.
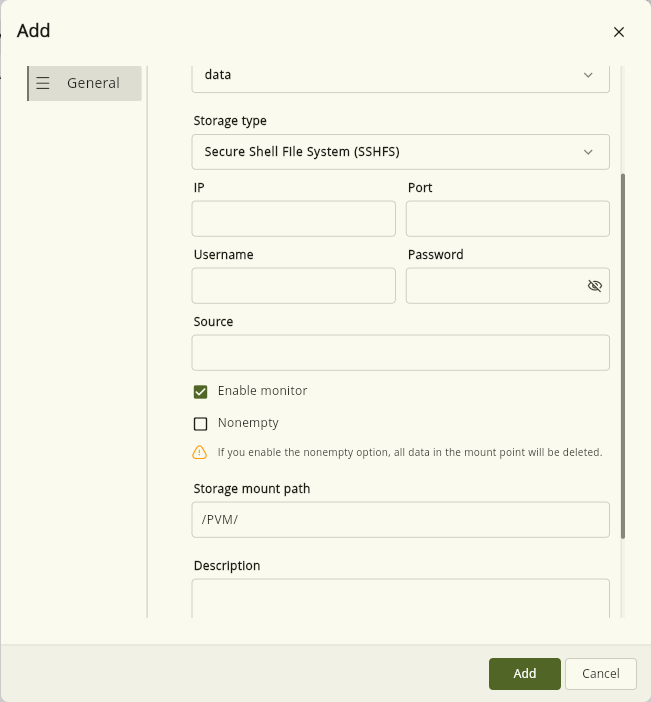
After selecting Secure Shell File System (SSHFS), the remote server connection information must be entered.
-
IP : Specifies the IP address of the SSH Server.
-
Port : Specifies the SSH service port.
-
Username : Specifies the username used for connecting to the SSH Server.
-
Password : Specifies the password of the user used for the connection.
-
Source : Specifies the required path on the remote server.
-
Enable monitor : When enabled, the system attempts to re-establish the storage connection if it is disconnected.
-
Nonempty : If this option is disabled and the destination path contains files, the mount operation will fail. When enabled, the system is allowed to remove the existing files from the destination path and then complete the mount operation.
If the Nonempty option is enabled, existing data in the Mount Point will be deleted. Make sure there is no required data in the path before enabling this option.
USB File System (USBFS)
USB File System (USBFS) is used for storage connected through USB.
This type of storage can be used to access USB drives or other USB storage devices.
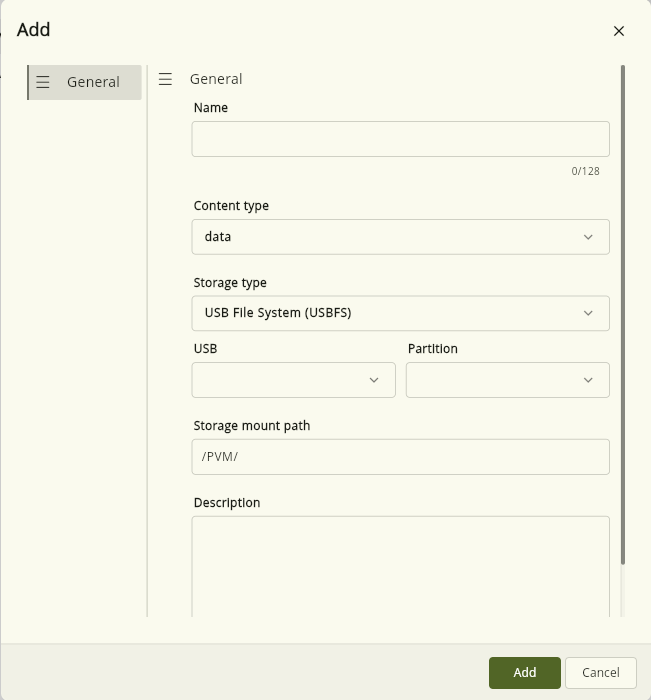
After selecting USB File System (USBFS), select the required USB device and partition.
-
USB : Selects the required USB device from the detected devices.
-
Partition : Specifies the required partition from the selected USB device.
The Mount USBFS and Unmount USBFS options are also available in the Storage section toolbar to manage USBFS storage.
For more information about USBFS, refer to the USB filesystem.
Volume Group
Volume Group is used for storage based on LVM (Logical Volume Manager).
In this mode, the storage uses an existing Volume Group in the system, and the required storage space is provided from that Volume Group.
This storage type is available for iso and data content types.
For more information about LVM, refer to the What is LVM?.
After selecting Volume Group in the Storage type field, the Volume group field is displayed.
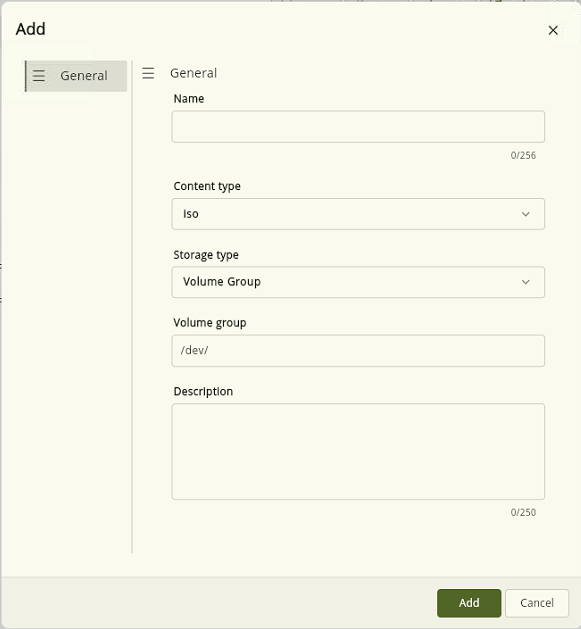
- Volume group : Specifies the Volume Group that will provide storage space for this storage.
Edit
To edit storage settings, select the desired storage row and click Edit.
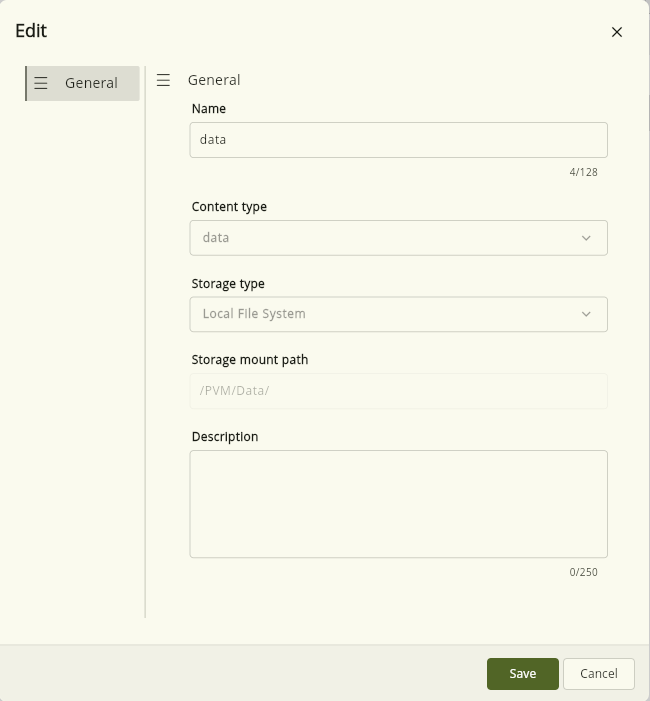
In the Edit window, some fields are editable while others are disabled.
Disabled fields cannot be changed because they depend on the storage structure or storage type.
After applying changes, click Save.
Available editable fields may differ depending on the storage type.
Delete
To delete a storage, select the desired row and click Delete.
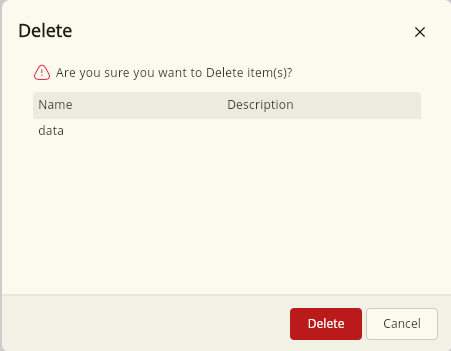
Before deletion, a confirmation window is displayed showing the selected storage name.
To continue deleting the storage, click Delete.
Export CSV
To export storage information in CSV format, click Export CSV.
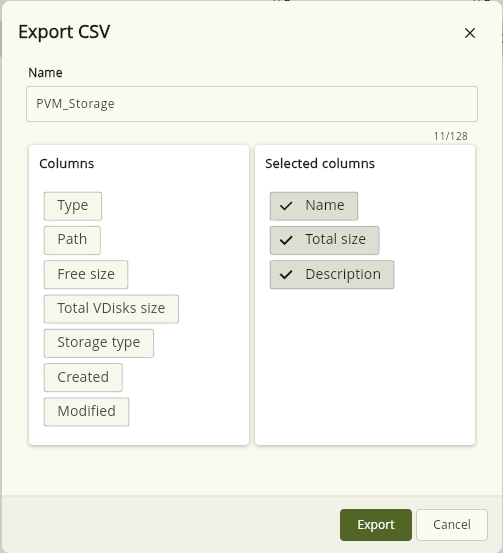
In the Export CSV window, you can select the information that should be included in the output file.
Available columns are displayed in this section, and only selected information will be included in the CSV file.
After selecting the required information, click Export.
Scan
The Scan option is used to check and identify available storage resources.
The Scan option is only available for storages with Data and ISO content types.
Mount USBFS
To mount a storage with USBFS type, select the required storage and click Mount USBFS.
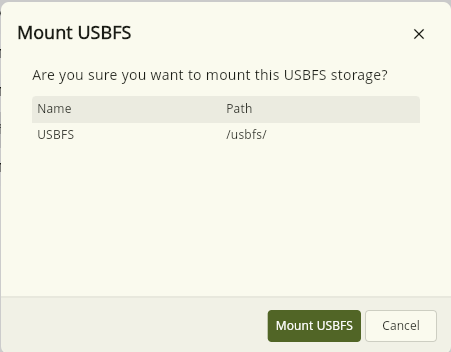
In the confirmation window, the storage name and mount path are displayed.
To continue the operation, click Mount USBFS.
Unmount USBFS
To unmount a storage with USBFS type, select the required storage and click Unmount USBFS.
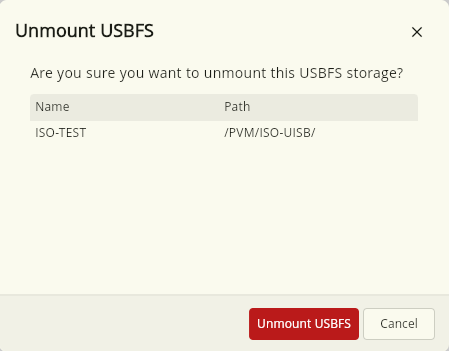
In the confirmation window, the storage name and mount path are displayed.
To continue the operation, click Unmount USBFS.
Before unmounting the storage, make sure there are no active operations or ongoing accesses on it.
Show Dashboard
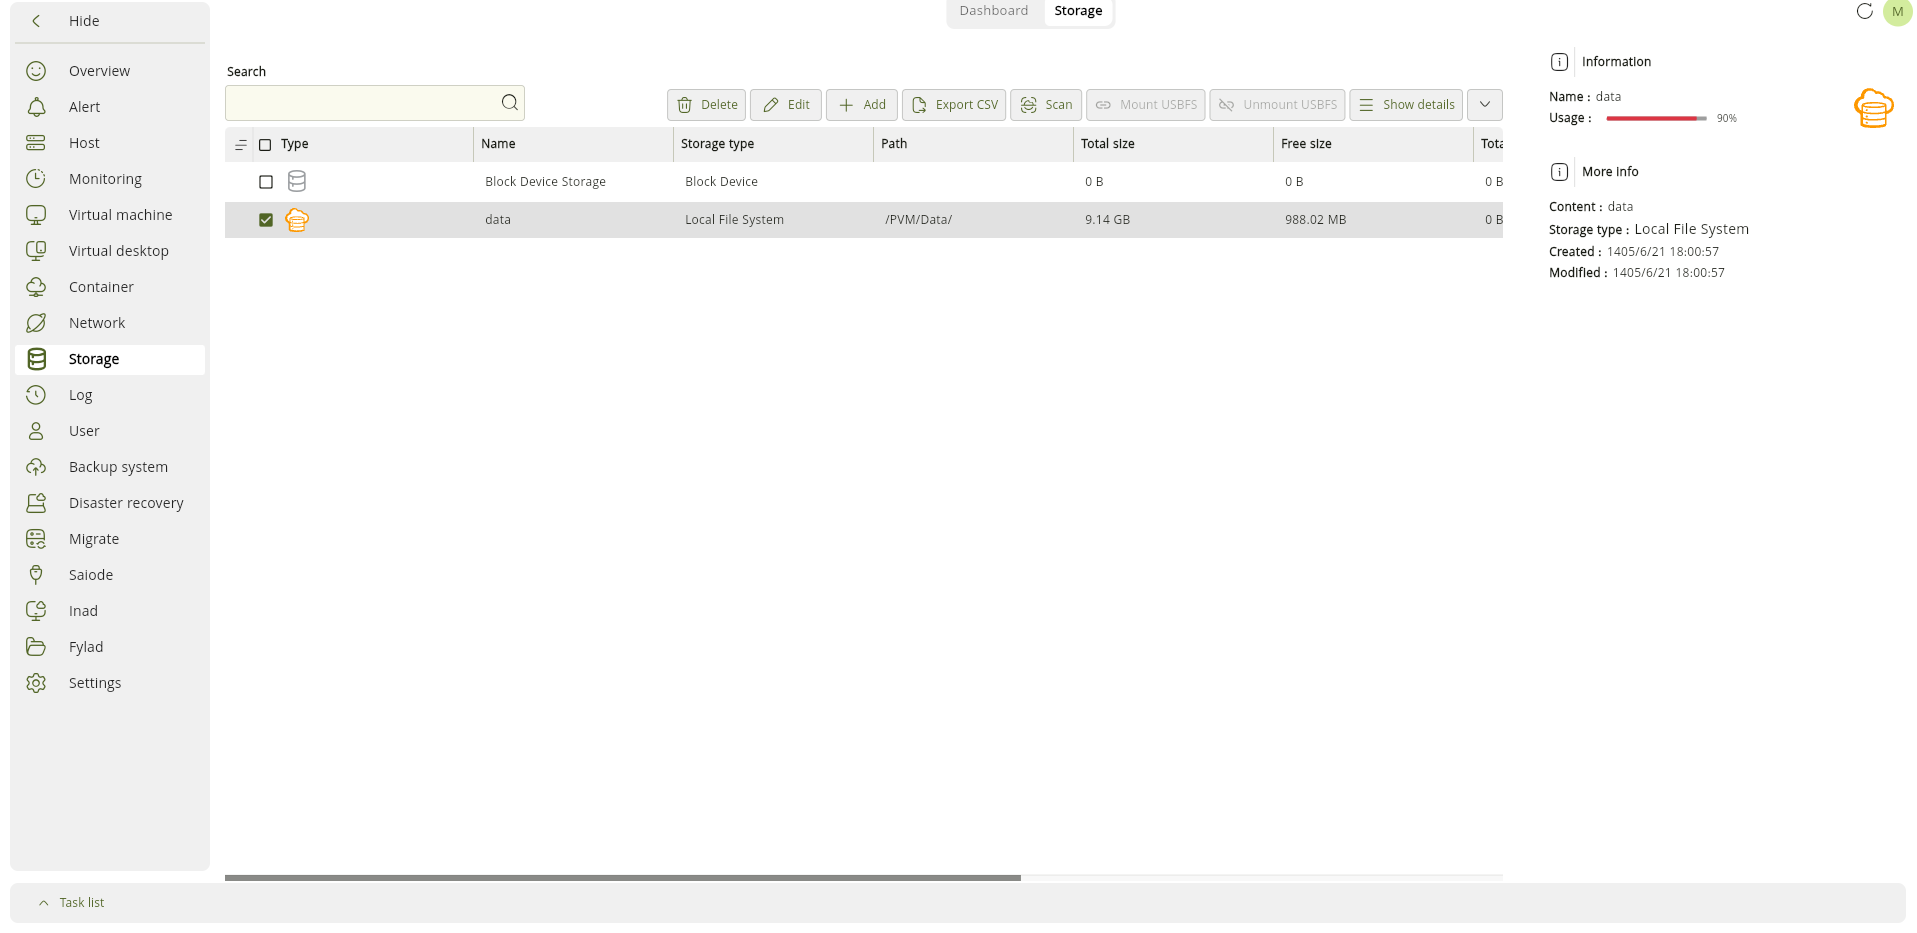
The Show dashboard option is used to display storage information and status in the dashboard view.
To use this feature, select the required storage and click Show dashboard.
Show Details
To view additional information about a storage, select the required storage and click Show details.
After selecting this option, the details section will be displayed at the bottom of the page.
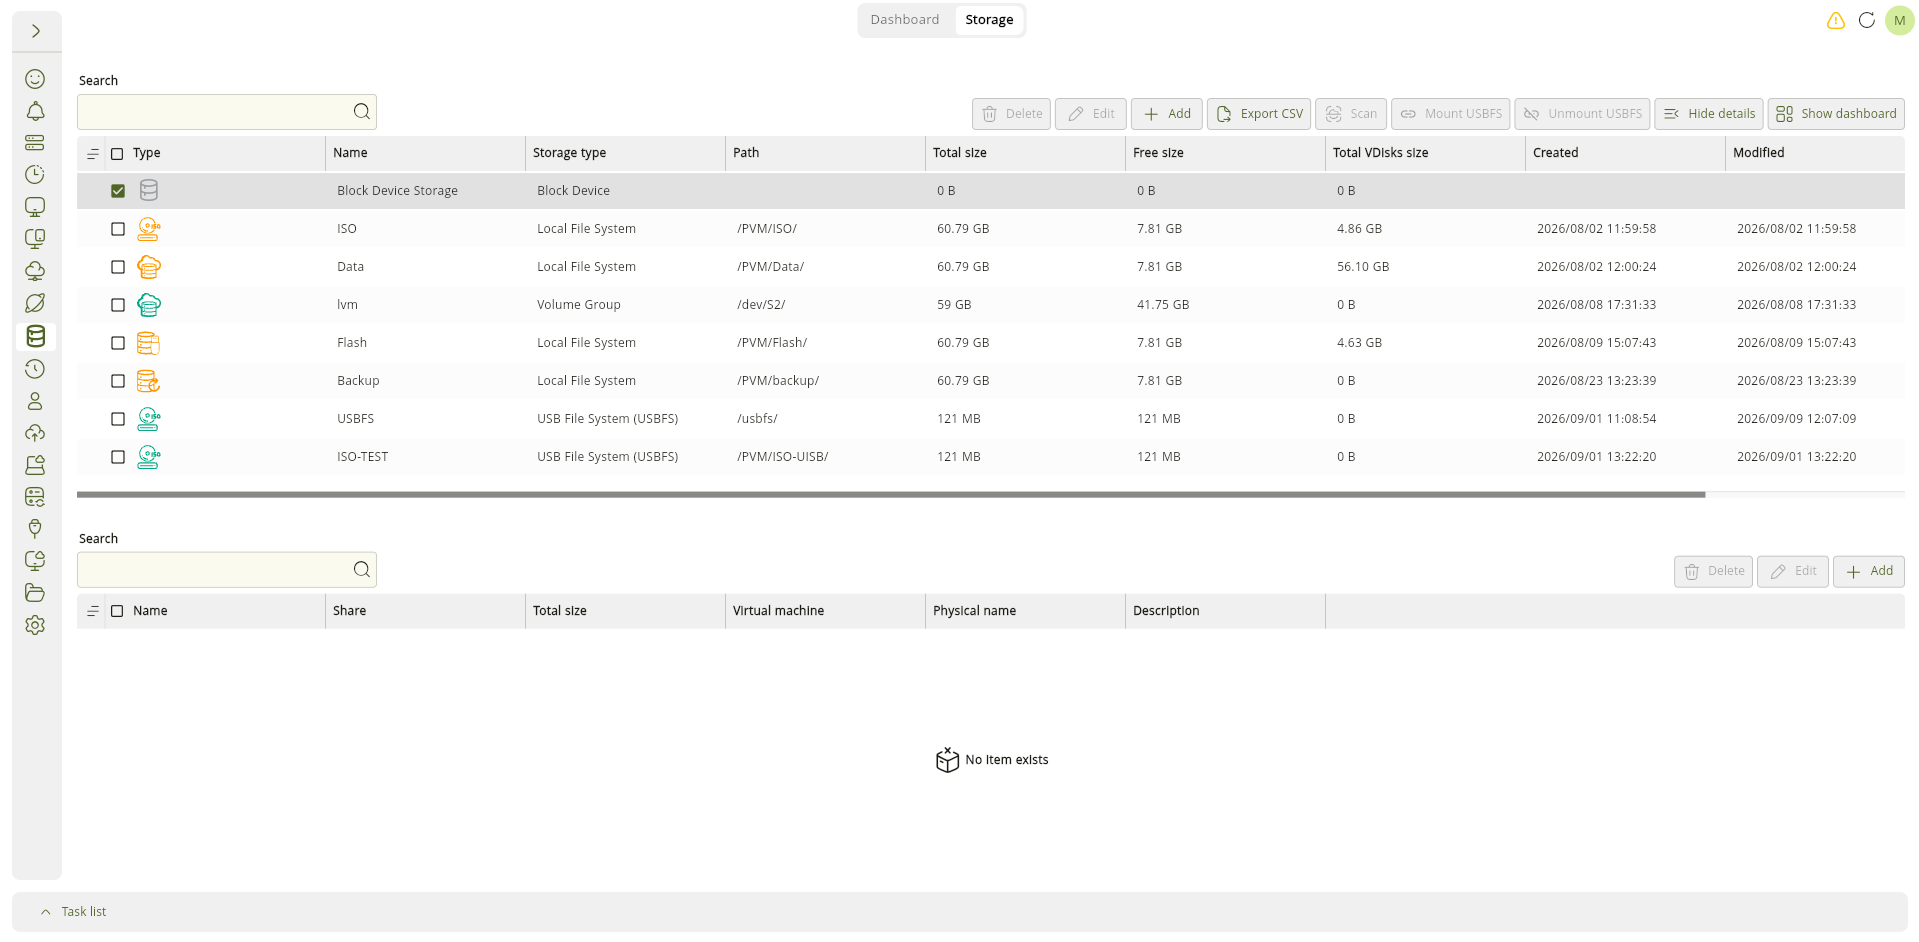
The information displayed in this section depends on the selected Content type.
Each section provides operations related to its content type through the toolbar available in that section.
The options displayed in the details section depend on the content type and the status of the selected resource.
Manage Virtual Disks in Data Storage
When the content type is Data, the list of virtual disks available in the storage is displayed in the details section.
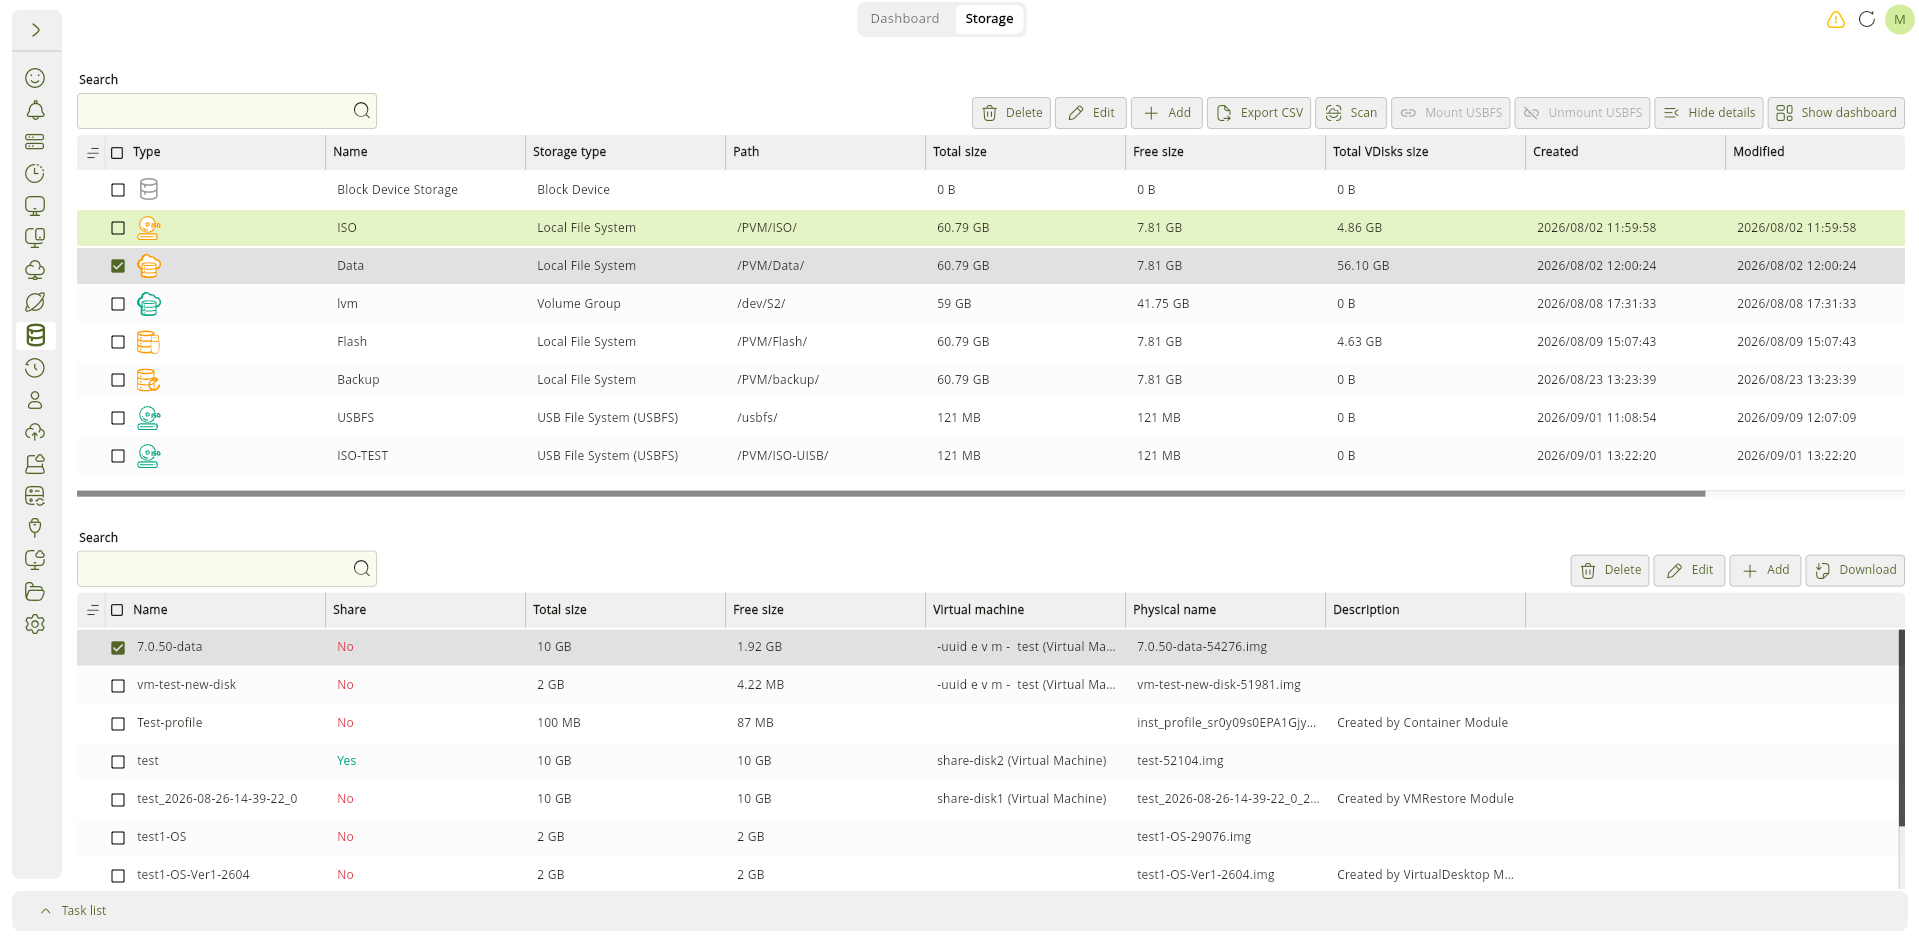
This section displays information such as disk name, sharing status, total size, free size, related virtual machine, and physical disk file name.
Available operations for virtual disks include the following:
Add Disk
To create a new virtual disk, click Add.
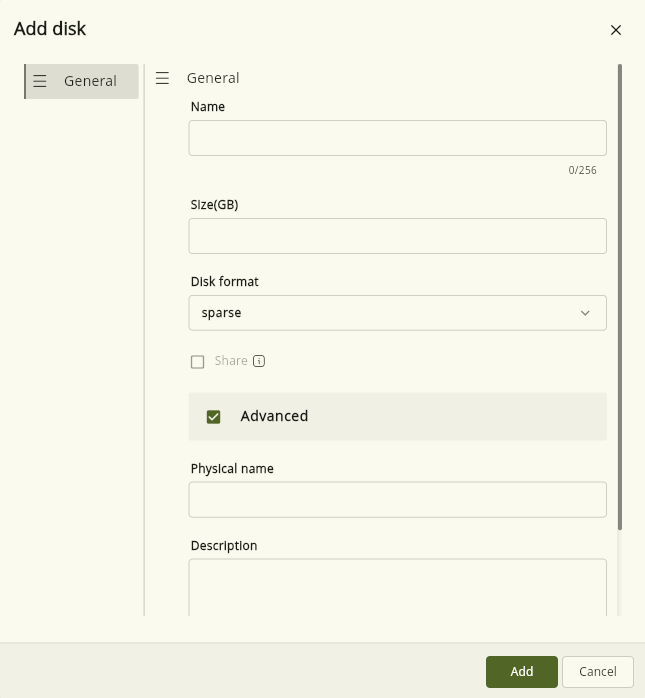
In the disk creation window, enter the required information.
-
Name : Specifies the name of the virtual disk.
-
Size (GB) : Specifies the required capacity for the disk.
-
Disk format : Specifies the storage format of the disk.
-
Share : Allows the disk to be attached to multiple virtual machines and used simultaneously. To disable sharing later, the disk must be attached to no more than one virtual machine.
-
Physical name : Specifies the physical name of the disk.
Available disk formats are:
-
Sparse : In this format, the physical disk space is allocated gradually based on the actual usage. This format is suitable when optimized storage space usage is required.
-
Raw : In this format, the entire defined disk space is allocated directly. This format is used in scenarios where full disk space allocation is required.
The Share option is only available for disks with Raw format.
After completing the settings, click Add.
Edit Disk
To edit a disk configuration, select the required disk and click Edit.
In the edit window, some settings can be modified while some fields are disabled and cannot be changed due to dependency on the disk structure or current usage status.
After applying changes, click Save.
Fields that cannot be modified in the edit mode may vary depending on the disk type and its usage status.
Delete Disk
To delete a virtual disk, select the required disk and click Delete.
After confirming the operation, the disk will be removed from the storage.
Before deleting a disk, make sure it is not being used by virtual machines or other services.
Download Disk
The Download option is used to download the virtual disk file from the storage.
After selecting this option, the disk file will be prepared for download.
Manage ISO Files in ISO Storage
When the content type is ISO, the ISO files available in the storage are displayed in the details section.
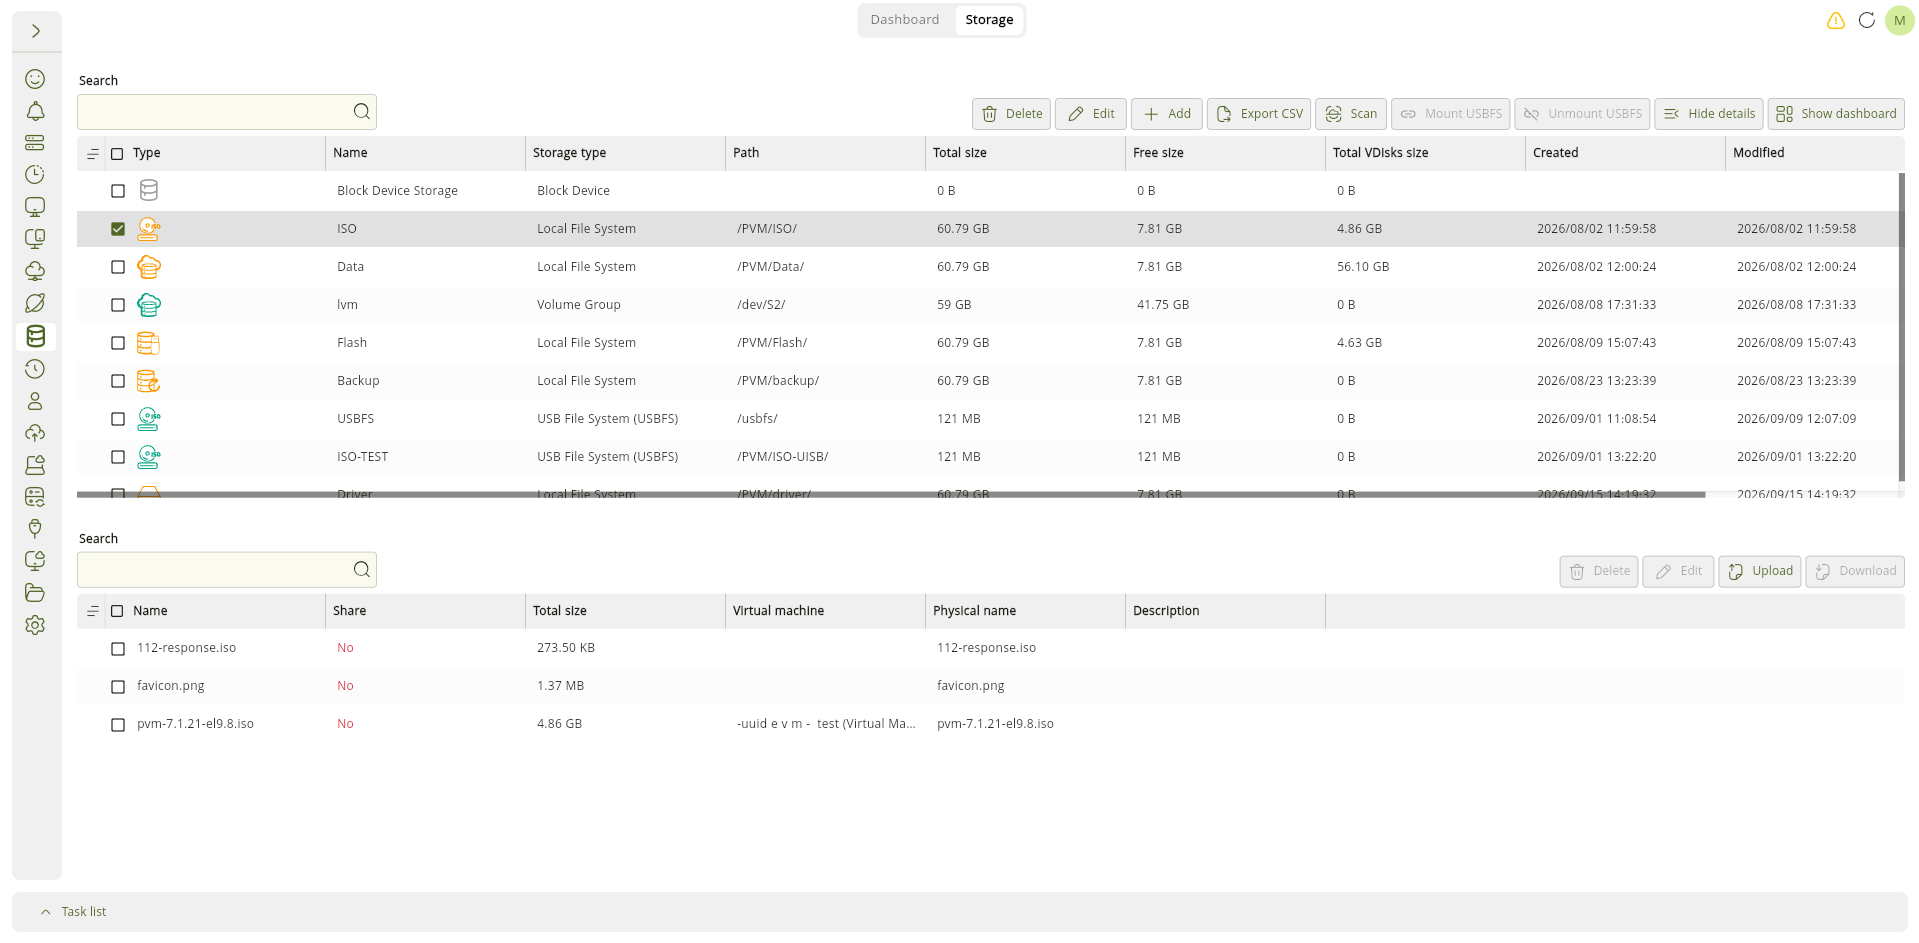
This section displays information about ISO files, including file name, size, related virtual machine, physical file name, and description.
Available operations for ISO files include the following:
Upload ISO
To add a new ISO file to the storage, click Upload.
After selecting the required file, the ISO file will be uploaded to the storage and displayed in the list.
Edit ISO
To edit the information of an ISO file, select the required file and click Edit.
Delete ISO
To delete an ISO file, select the required file and click Delete.
Before deleting an ISO file, make sure it is not being used by virtual machines.
Download ISO
To download an ISO file, select the required file and click Download.
In the storage details section, the displayed information and available operations depend on the content type.
-
Driver: Available Driver files in the storage are displayed, and the only available operation is Delete.
-
Backup: Available Backup files in the storage are displayed, and the only available operation is Delete.
-
Flash: Information about available Flash resources in the storage is displayed, and no management operations such as Add, Edit, or Delete are available.