Virtual Network Management in Plaivid
In the virtualization ecosystem, virtual machines and containers require a network infrastructure to communicate with each other and the outside world. The Plaivid Manager platform provides this infrastructure through a centralized and integrated user interface.
In this platform, you can use two completely different architectures for networking:
- Linux Bridge — Suitable for simple scenarios and basic network structures
- Virtual Switch (OVS) — Suitable for advanced, flexible, and modular architectures
For System Engineers: All operations you perform with a few clicks in the Plaivid Manager panel are being translated in the background into native operating system commands (brctl, ip link, or ovs-vsctl) on physical servers (PVM).
Network Dashboard
Upon entering the Network menu in the Plaivid panel, you first encounter the dashboard view. The dashboard plays the role of a control tower — a page that shows the status of all created networks, the physical interfaces connected to them, and VLAN IDs at a glance.
In the upper corner of this page, there is a selector (radio button). By changing this selector between Bridge and Virtual Switch, the information table as well as the operational menus on the right side of the page change completely.
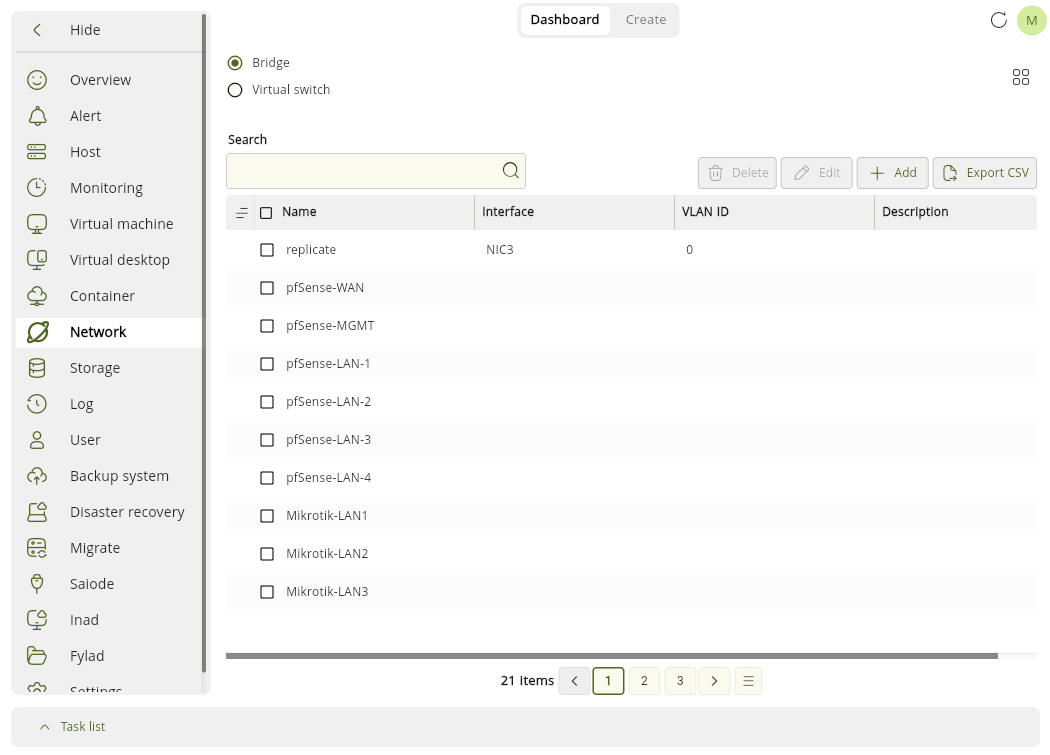
Use the search bar and CSV output button on the dashboard to quickly find and document specific ports and networks in busy infrastructures.
Creating a Linux Bridge
A Bridge operates like a simple electrical junction box — a basic software switch that connects virtual machine traffic directly and without complexity to the server's physical network card. This method is ideal for development environments and flat networks (no need for advanced management).
Scenario: Suppose we want to create a virtual web server that must be placed directly on the same simple physical network (without a VLAN tag).
To do this, click on Create in the top tab of the page. By selecting the "Bridge" option, a unified form is displayed to you.
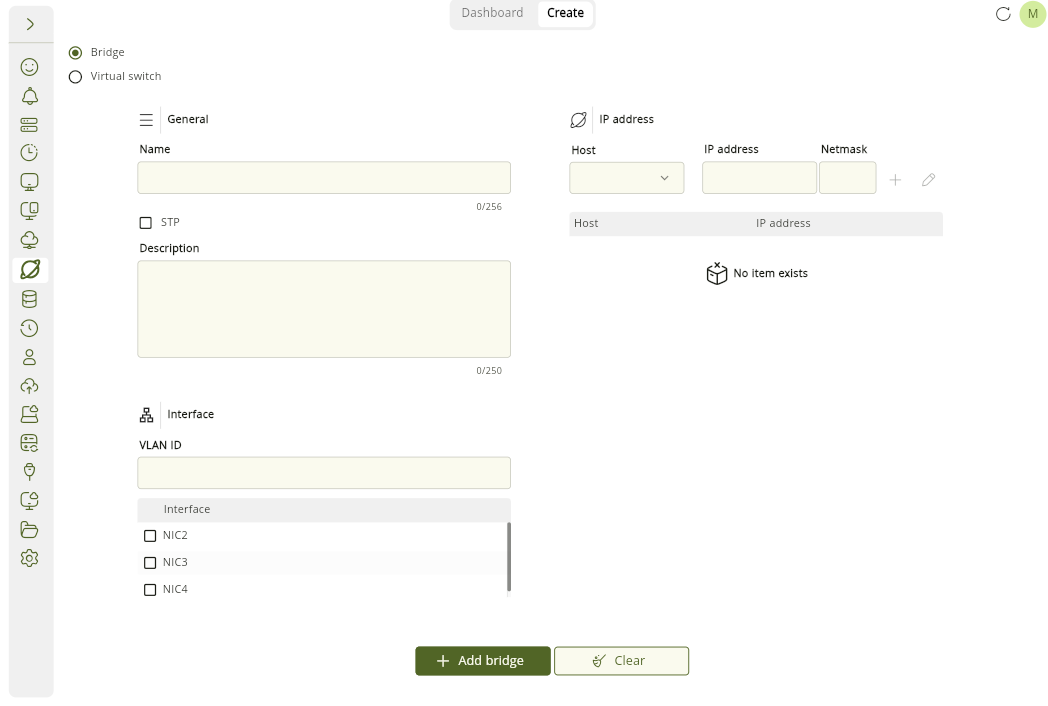
In this form, there are three main columns:
- General Column: Enter the name and description of the bridge. You can enable the STP (Spanning Tree Protocol) option if needed.
- IP Address Column: If the physical server (Host) itself also needs to be present in this network and get an IP, enter the address and subnet here.
- Interface Column: Check the server's physical network card (e.g.,
NIC2) that is supposed to direct traffic outward. If your physical network is on a specific VLAN, enter its ID as well.
By clicking the "Add Bridge" button, your network is created and ready to be used by virtual machines.
Once a physical network card is assigned to a Bridge, that network card will no longer be usable or assignable to other Bridges you create later. Therefore, before assigning a network card to a Bridge, ensure you have selected the correct network interface.
Creating a Virtual Switch (Virtual Switch / OVS)
Unlike the Bridge which has a simple and monolithic structure, the Virtual Switch in Plaivid is designed based on the modular architecture of Open vSwitch (OVS). Here, you assemble a switch like puzzle pieces.
For a deeper understanding of Layer 2 concepts, the difference between Access and Trunk, and complex network architectures, be sure to read the Open vSwitch Architecture document.
Scenario: We want to build an isolated network for databases on VLAN 20 and transfer its traffic via the NIC3 network card to the organization's physical switch.
The steps for creating a virtual switch in the Plaivid panel consist of four distinct steps:
Building the Switch Chassis
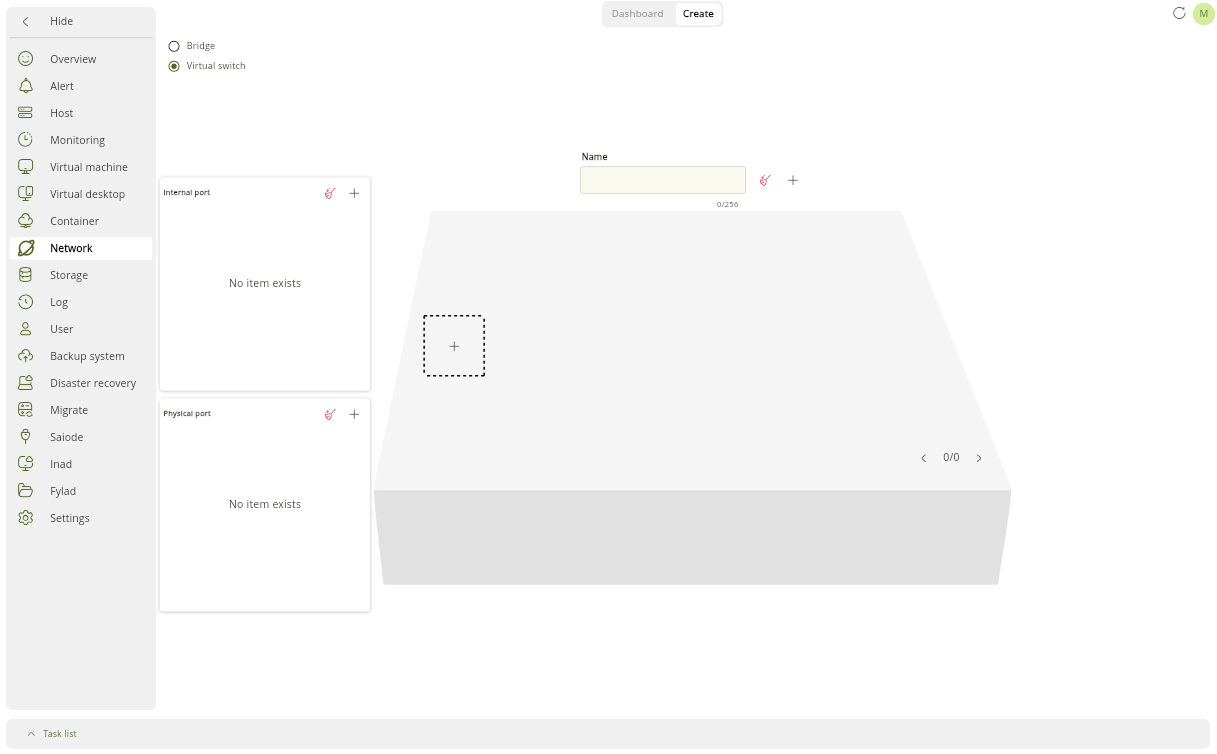
In the Create tab, place the radio button on Virtual Switch. The user interface changes like a 3D canvas. The first task is to determine the name of the switch. This name only identifies the main body of your switch and does not have any network behavior yet.
Adding Physical Port (Uplink)
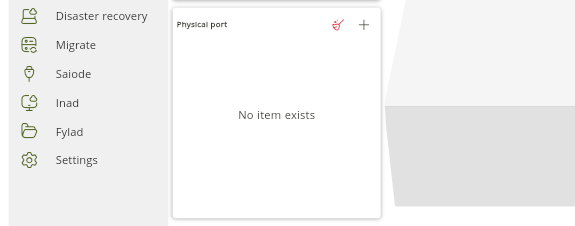
The switch needs a path to communicate with the outside world. In the right panel, click on Physical Port (icon +). A new window opens.
In this section, enter a desired name and from the "Device" dropdown menu, select the desired physical network card (e.g., NIC3). This port plays the role of the communication bridge (Uplink) between your switch and the outside world.
Never set the server's management IP address directly on the physical port connected to OVS. This causes disruption in virtualization traffic routing.
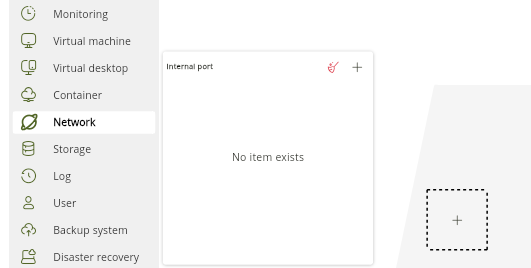
Adding Internal Port (Internal Port)
Sometimes the server itself (hypervisor) needs to communicate with other networks through the same switch you built.
To do this, click on Internal Port. In the opened form, you can define an IP address and subnet for the physical host itself so the server enters the network circuit securely.
Creating Profiles and Applying Restrictions
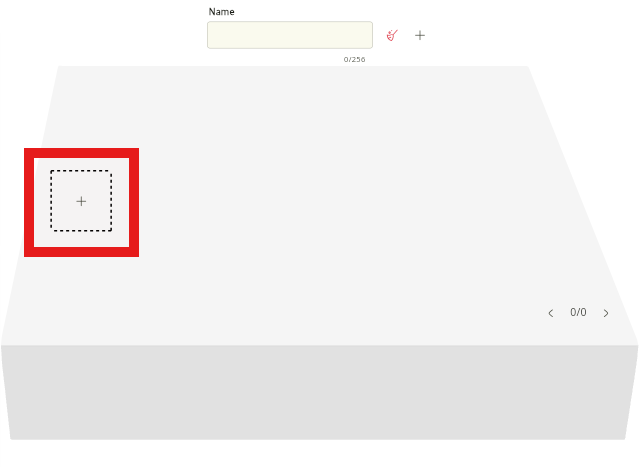
A network profile is like a behavioral template — a set of Layer 2 rules that determines what access permissions any port connected to it will have. To connect virtual machines to the switch, you must create a profile.
Click on the + icon next to the switch canvas to open the profile form.
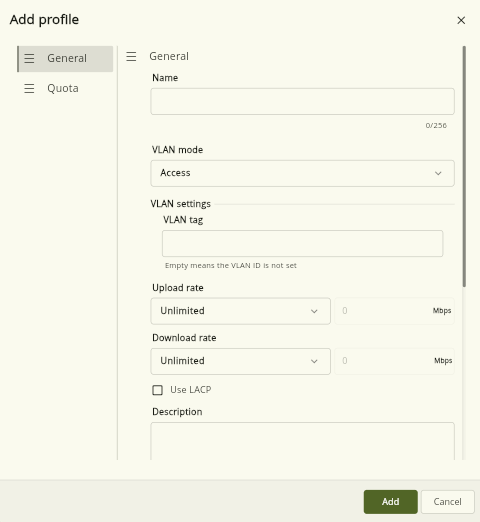
In the General section, configure the following:
- VLAN Mode: Specify whether this profile is Access (for direct VM connection) or Trunk (for passing multiple VLANs simultaneously).
- VLAN Tag: For our scenario, enter the number
20. (If left empty, untagged traffic passes). - Speed Settings: You can limit upload and download bandwidth (Rate Limiting).
- LACP: Check this option to aggregate multiple physical links.
Traffic Accounting System: In the Limits tab, you can specify how many gigabytes of total traffic this profile is allowed. You can also configure this limitation to automatically reset on specific days of the week.
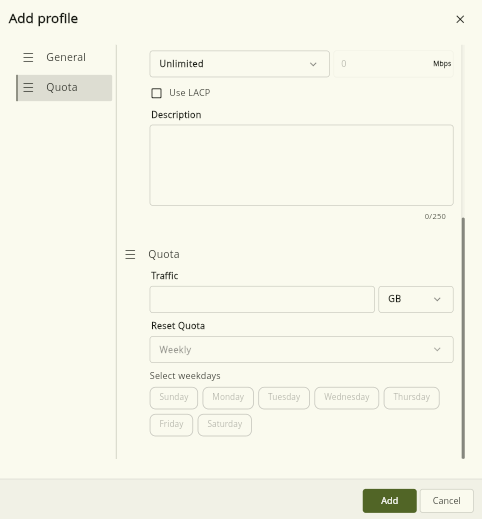
After registering the profile, your virtual machines can select this profile in their settings section and connect to the network.
Summary
- The network dashboard provides a centralized view of all Layer 2 connections (VLANs, interfaces, and switch types).
- For creating simple networks without the need for advanced management, use Linux Bridge.
- Creating a Virtual Switch (OVS) is a step-by-step process: building the chassis, determining the physical port, and finally creating profiles.
- Profiles are the heart of virtual switches that define tagging behavior (VLAN), speed, and traffic volume limits (accounting).
- Assigning an IP to the server itself in the OVS structure must only be done through an Internal Port.