Introduction
Plaivid — Avid Cloud Platform — is an advanced, secure cloud platform that provides scalable and centralized infrastructure. It helps organizations develop their services faster and gain complete control over their IT resources.
This guide walks you through the basics of the platform: signing in, exploring the dashboard, navigating the sidebar, and managing your account.
Logging In
To access the platform, open the application in your browser. You will be greeted by the login page:
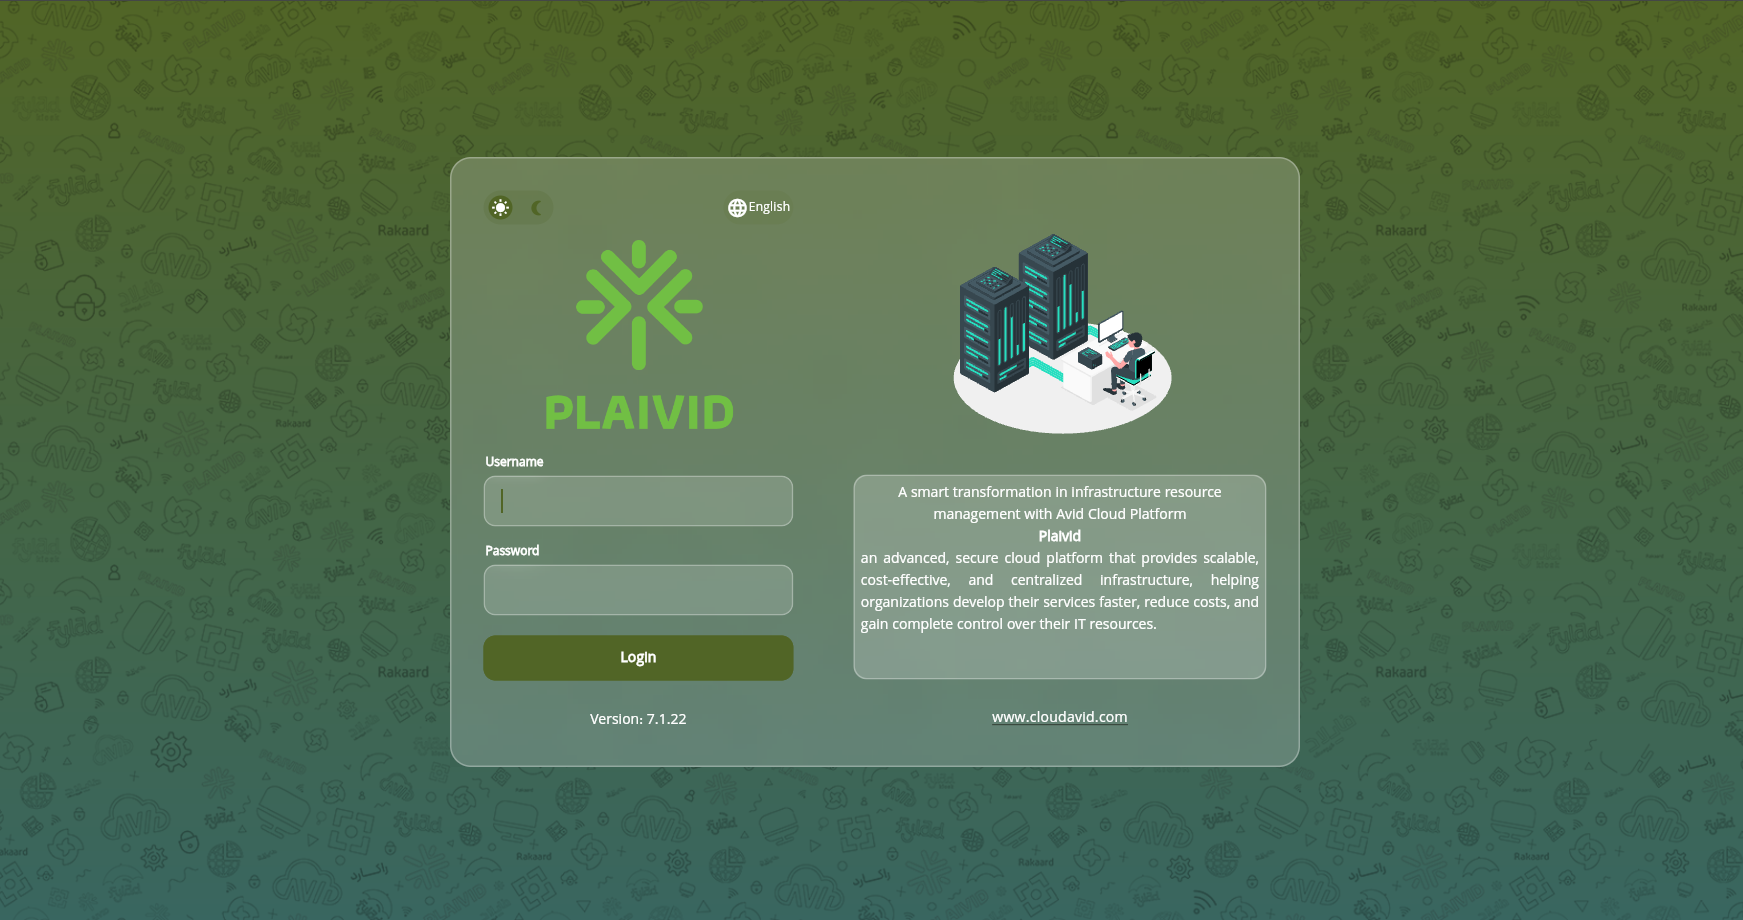
- Enter your Username and Password in the corresponding fields.
- Click Login to access your dashboard.
A few helpful options are available on this screen:
- Theme toggle — switch between light and dark mode using the sun/moon switch at the top.
- Language selector — change the interface language (e.g., English) from the globe icon.
- The current platform version is displayed at the bottom of the form.
Dashboard Overview
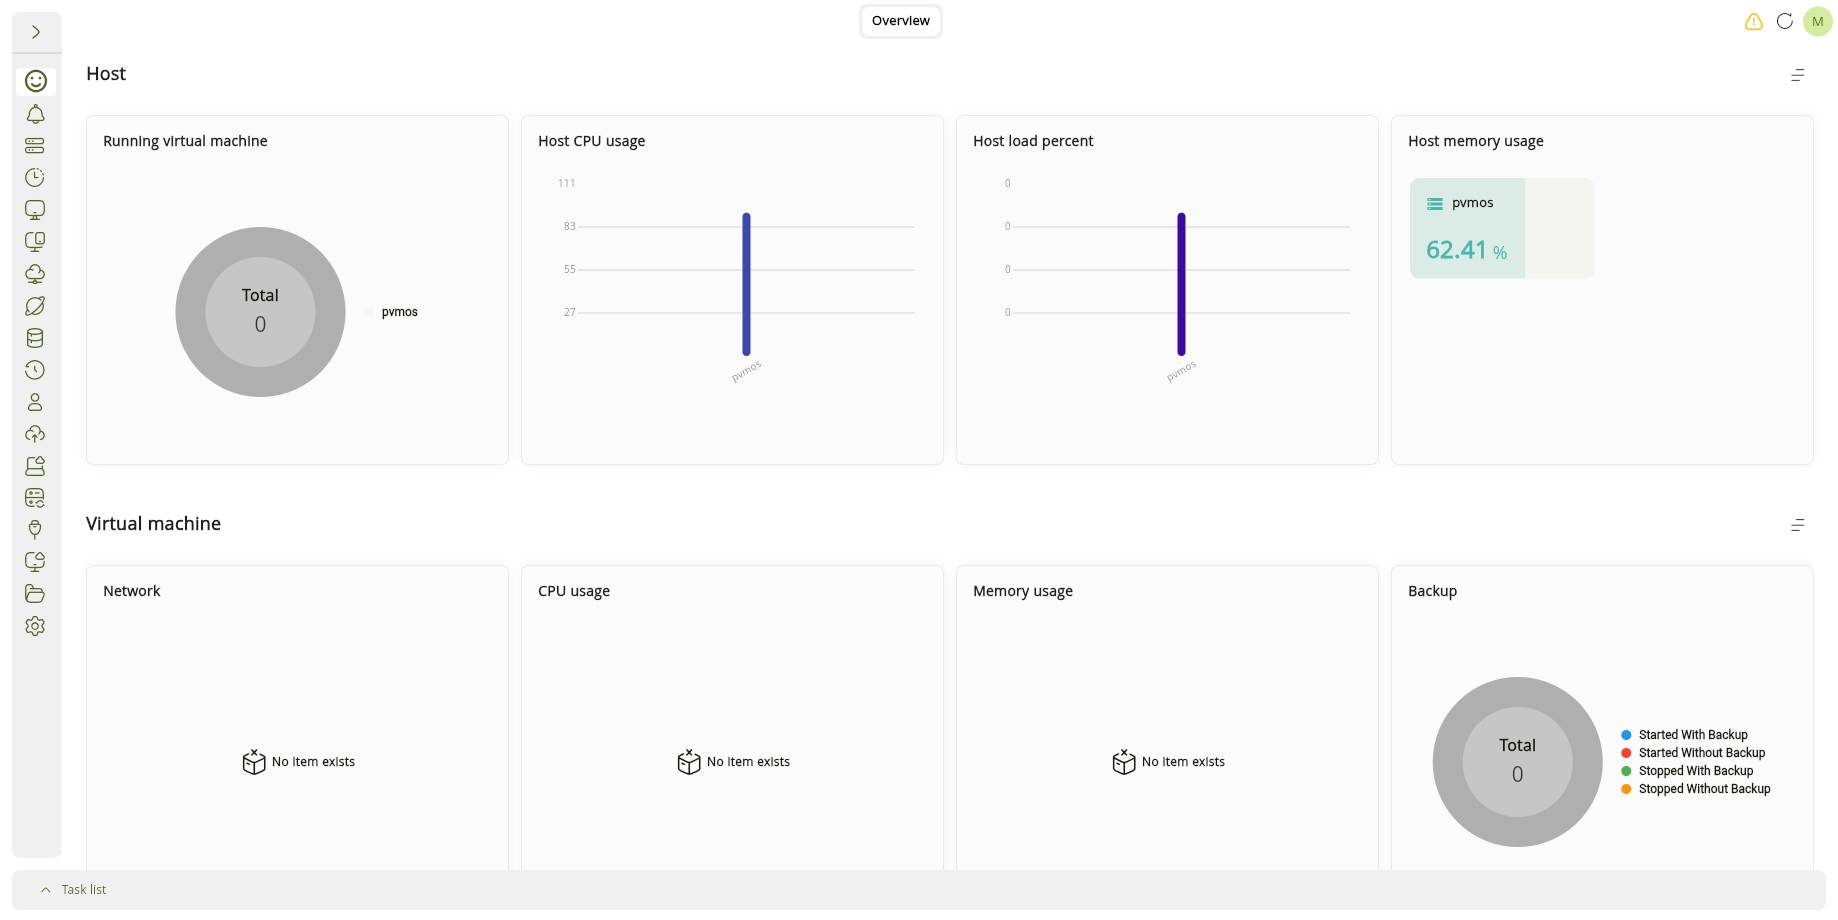
After logging in, you land on the Overview page — the main dashboard that gives you a real-time, at-a-glance view of your infrastructure health and resource usage.
Navigating the Sidebar
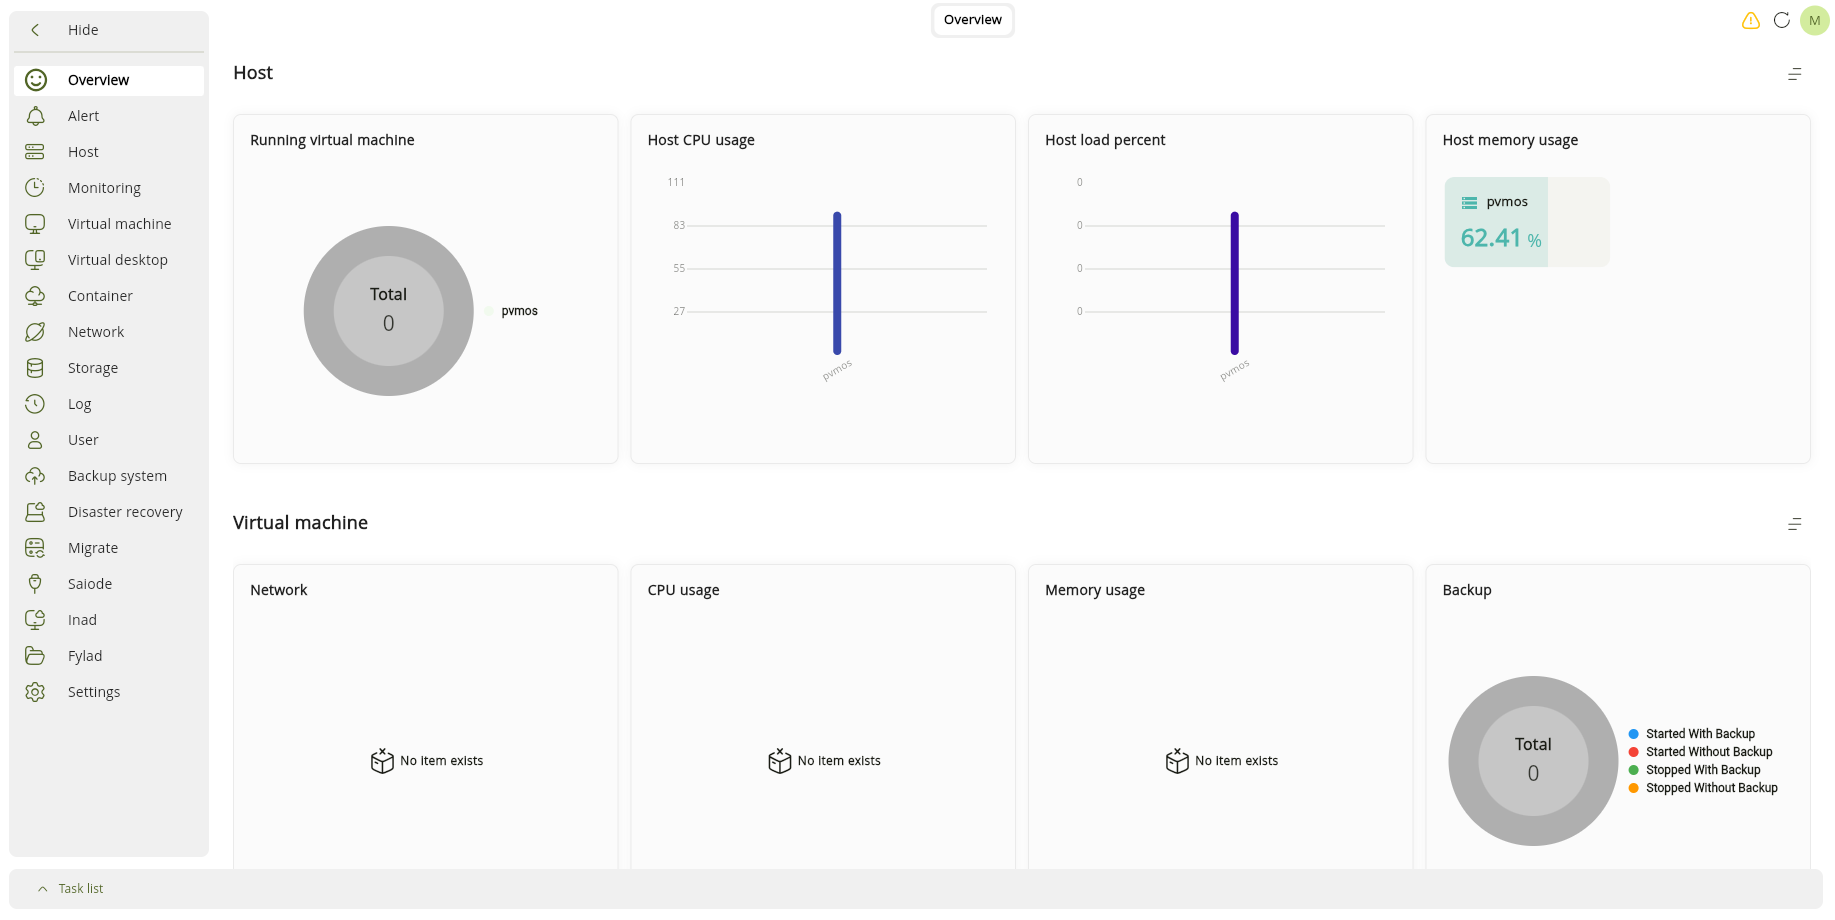
The sidebar on the left is your main navigation menu. It provides access to all major platform features, including Virtual machine, Virtual desktop, Container, Network, Storage, User, Backup, Replicate, Migrate, and more.
Expanded Sidebar
When expanded, each menu item is shown with its icon and full label:
User Menu
Click your avatar in the top-right corner of the header to open the user menu:
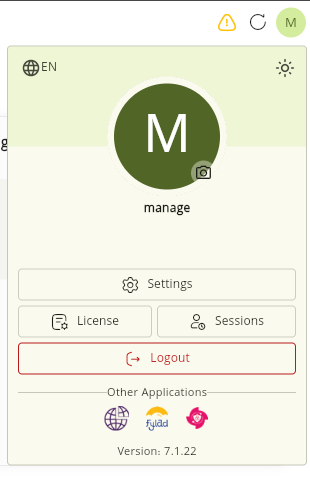
From here you can:
- Settings — open your personal account settings.
- License — view platform license information.
- Sessions — review and manage your active login sessions.
- Logout — securely sign out of the platform.
- Other Applications — quickly jump to related applications in the suite.
Edit Profile
To edit your account details, click your profile picture (camera icon) in the user menu to open the Edit Profile dialog. It contains the following four tabs:
Personal Information
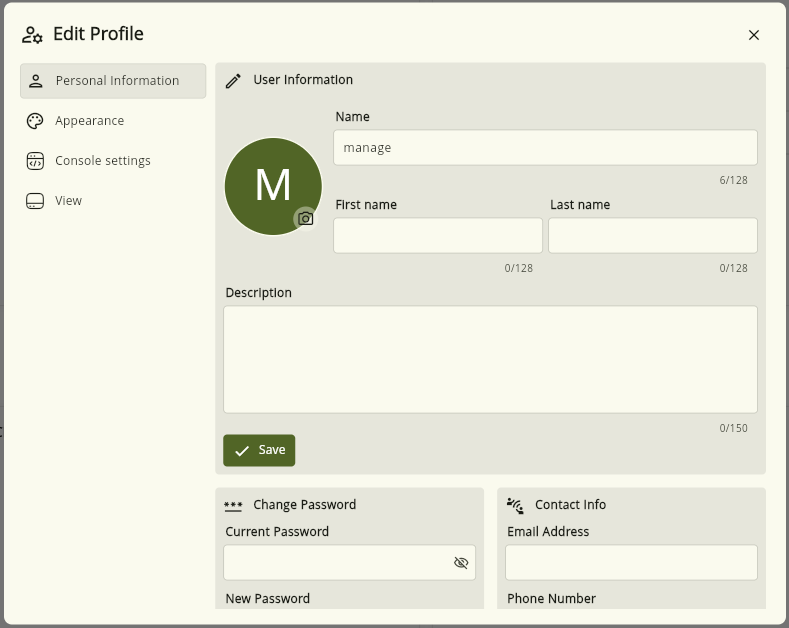
- User information — edit your First name, Last name, and Description (up to 128 characters for names and 150 for the description). Click Save to apply your changes.
- Profile picture — click the camera icon to upload or change your profile photo.
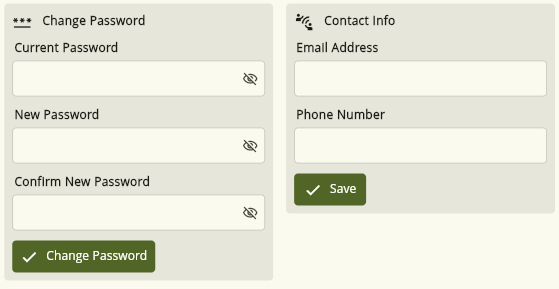
- Contact information — enter your email address and phone number, then click Save.
- Change password — enter your current password, new password, and confirm new password, then click Change Password.
Appearance
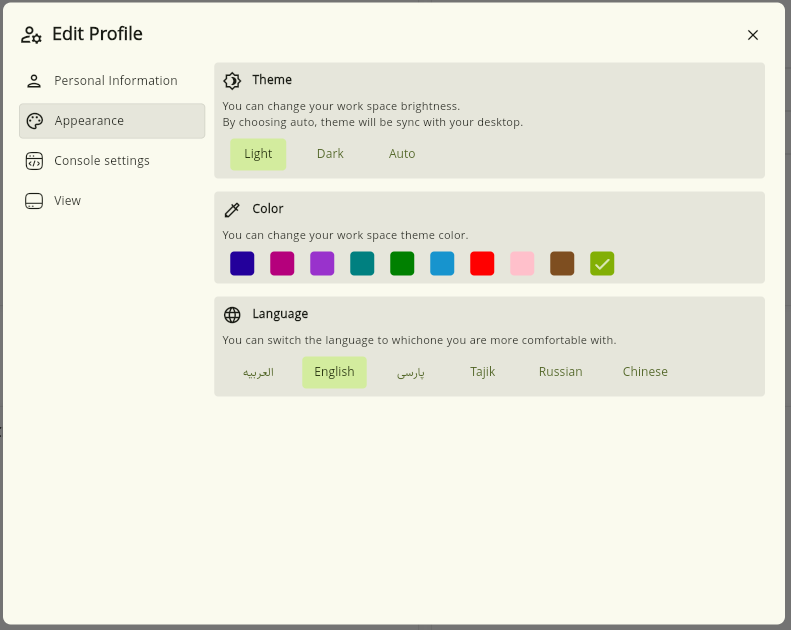
- Theme — choose between Light, Dark, and System modes.
- Color — select the primary interface color from the available palette.
- Language — change the interface language (English, Farsi, Arabic, Tajik, Russian, Chinese).
Console Settings
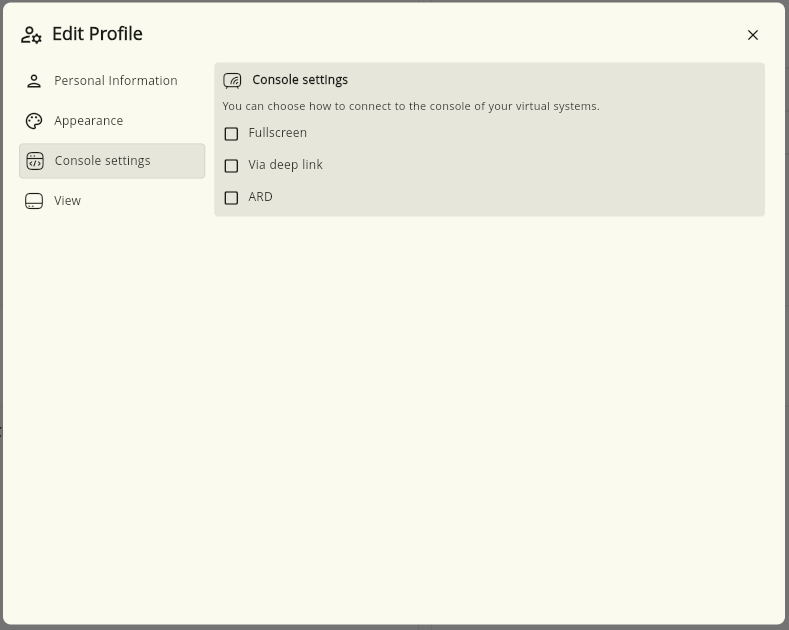
Configure how the console connects to your virtual machines:
- Full-screen connection — open the console in full-screen mode.
- Connect via deep link (Inad viewer) — enable connections through the Inad viewer.
- ARD — enable the ARD feature.
Display
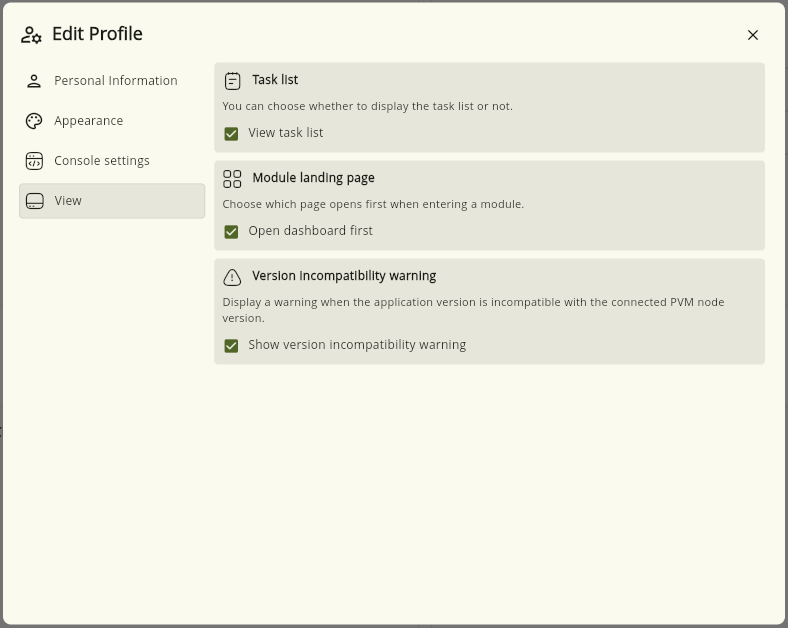
- Task report — show task reports in the workspace.
- Module start page — choose which page opens by default when entering each module.
- Version mismatch warning — show a warning when the application version is incompatible with the PVM version.
License
Click License in the user menu to open the Avid products license dialog:
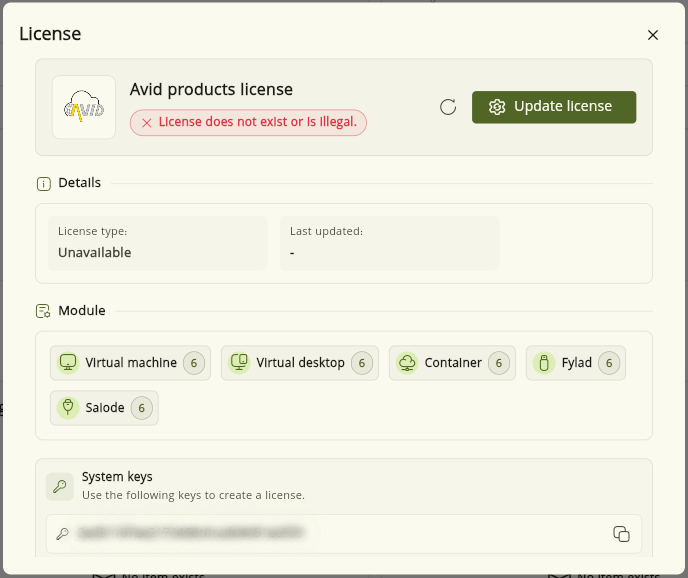
In this dialog:
- License status — shows the current license state. If no license exists or it has expired, a warning message is displayed. Click Update License to upload a new license.
- Details — shows the license type and the last update date.
- Modules — platform modules with their allowed counts: Virtual machine, Virtual desktop, Container, Firewall, and Saiode.
- System keys — view your system's unique key and copy it using the copy icon. This key is used to generate a license.
Sessions
Click Sessions in the user menu to open the session management dialog:
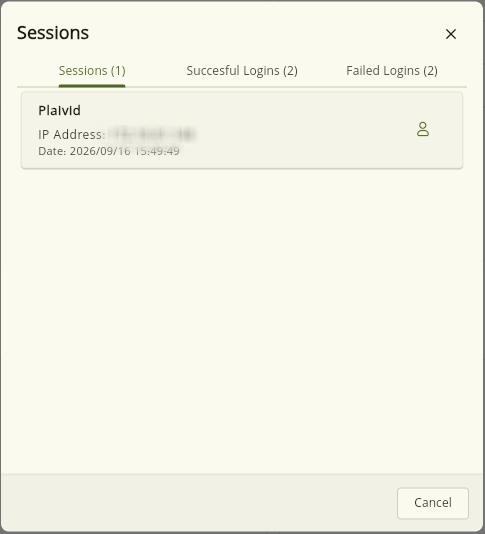
This dialog contains three tabs:
- Sessions — your active sessions with the username, IP address, and login date. Click the end-session button to close a specific session.
- Successful logins — a list of your recent successful logins.
- Failed logins — a list of failed login attempts to your account; reviewing this tab helps detect suspicious access.
Task List
At the bottom of the screen, the Task list panel keeps you informed about background operations and recent activities on your account.
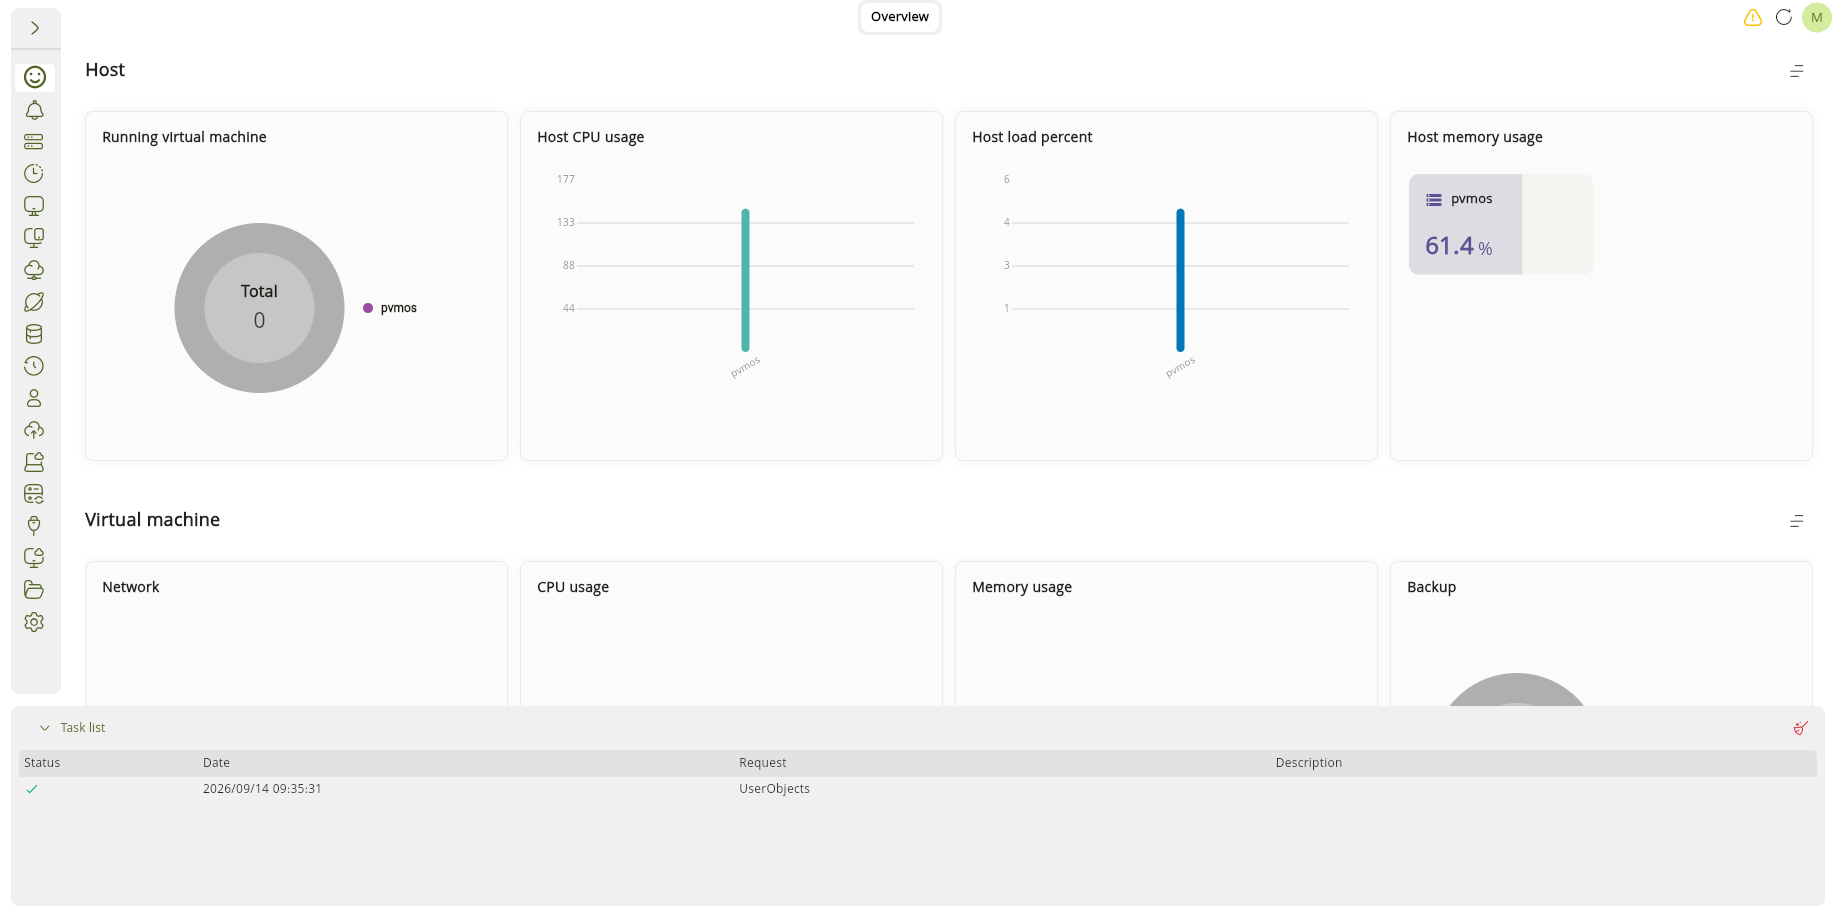
- Click Task list to expand or collapse the panel.
- Each row shows the task Status (✓ for successful), Date and time,
Request type (e.g.,
UserObjects), and a Description. - Use the clear icon on the right to dismiss completed tasks.
Next Steps
Now that you're familiar with the interface, explore the following sections to learn more:
- Storage — Add and configure storage
- Network — Connect your VMs to the network
- Virtual Machines — Create and configure VMs