Add & Edit
Fylad share storage provides file storage that can be configured with a specified capacity, sandbox support, automatic cleaning, and a recycle bin retention policy.
Open Fylad, and then select the Share storage tab.
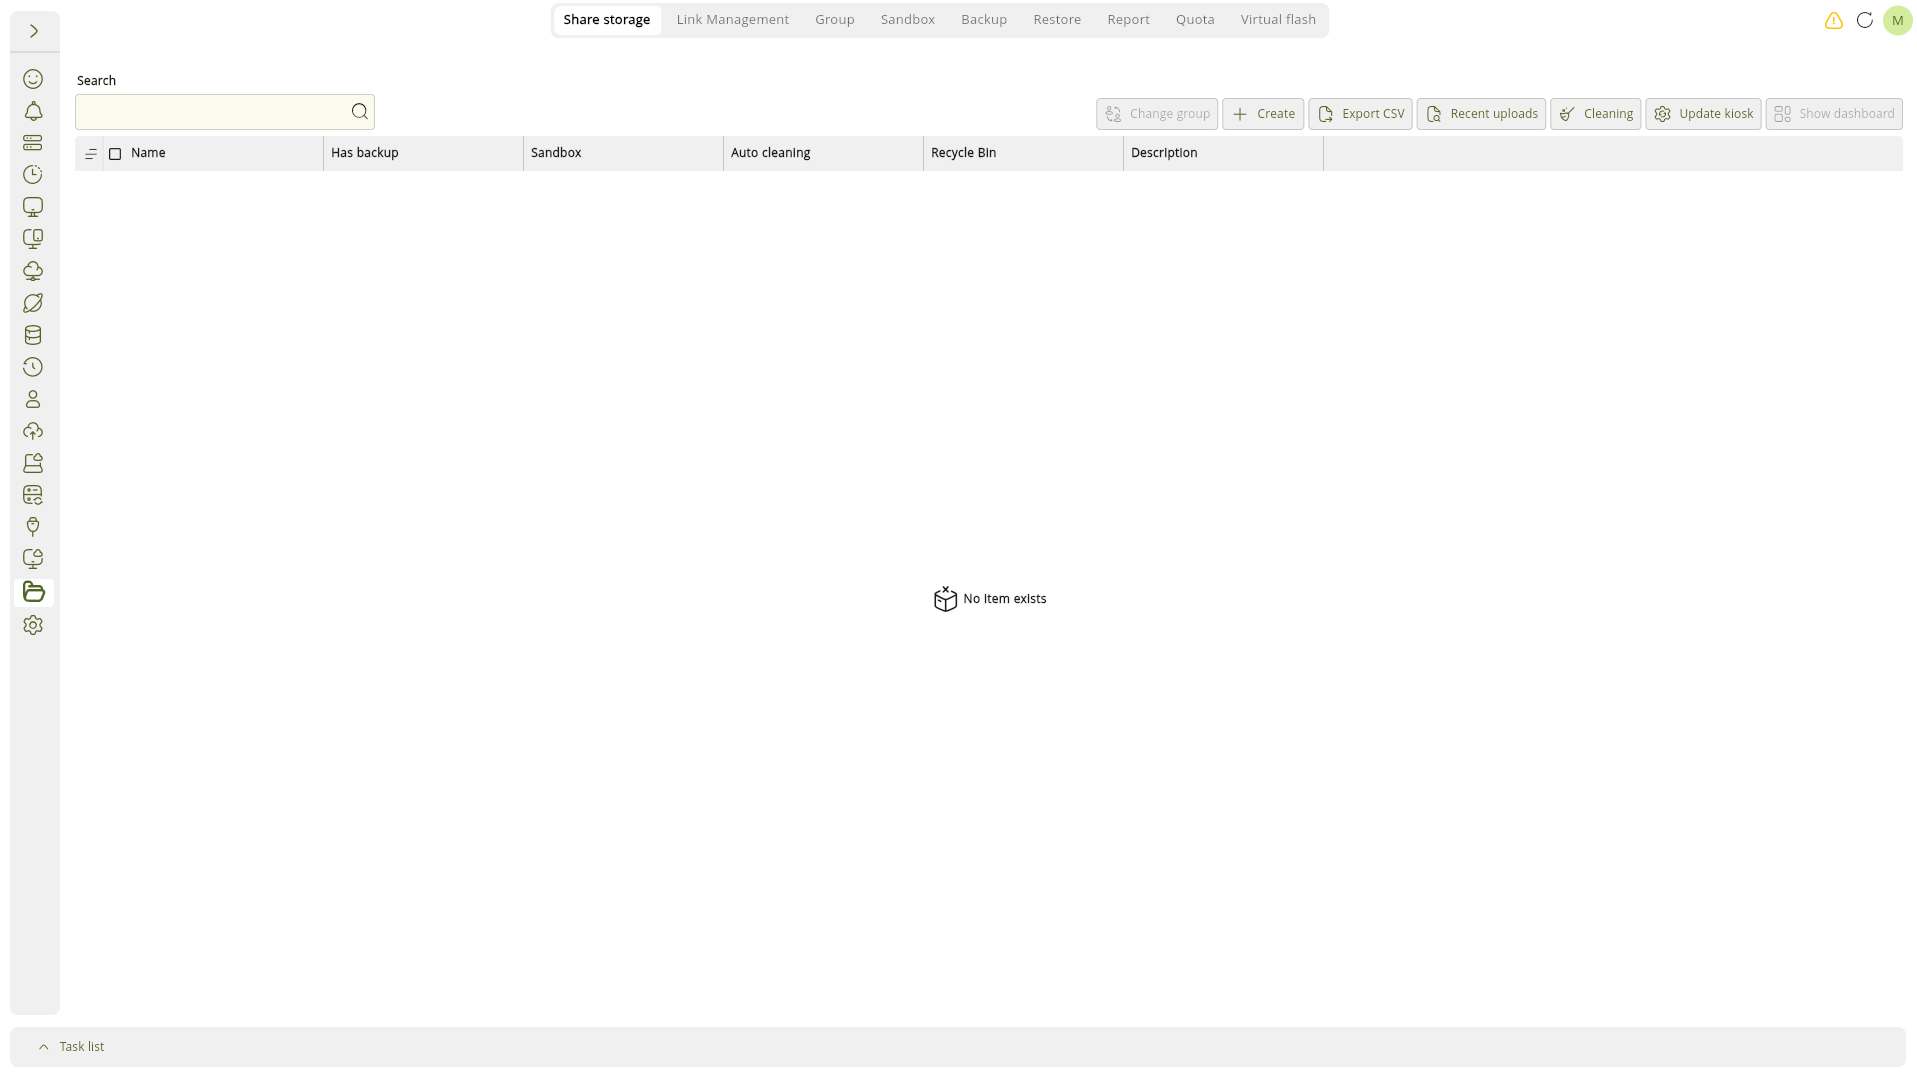
- The table: shows each share storage's name, backup availability, sandbox status, automatic cleaning status, recycle bin status, and description.
- Use Search to filter the list.
Choose a creation method
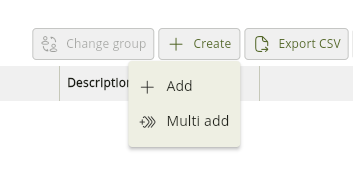
Click Create, and then choose one of the following options:
- Add creates a single share storage.
- Multi add creates share storage for multiple selected users or groups with the same configuration.
Add a share storage
Select Create > Add to open the Add share storage dialog. The dialog is divided into General, Auto cleaning, and Recycle Bin sections. Select a section in the left navigation or scroll through the form.
General settings
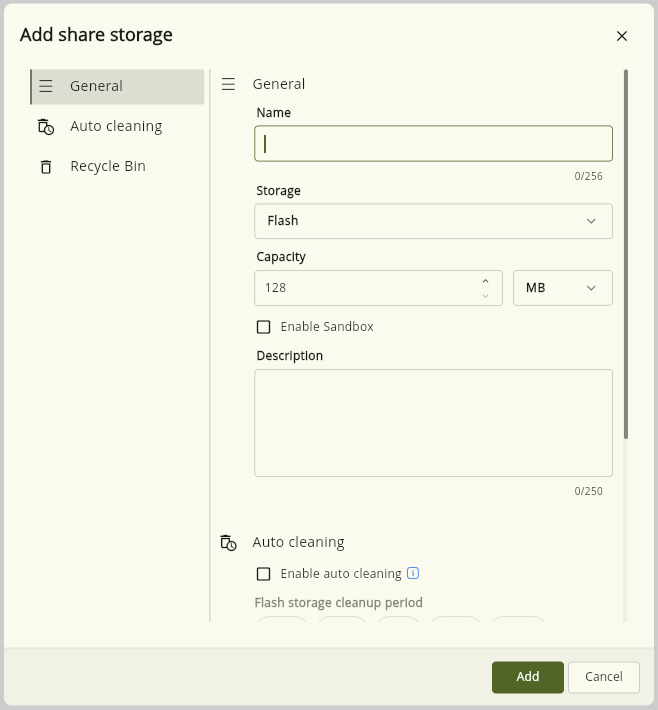
- Name: Enter a name for the share storage. This field is required.
- Storage: This filed show all flash type storages. Select the storage that you want to provide your share storage space. The first available storage is selected by default.
- Capacity: Set the maximum size and select its unit. Supported values are
128,256, or512MB;1through999GB; or1TB. The default is128 MB. - Enable Sandbox: Enable sandbox protection for the share storage.
- Description: Enter an optional description of up to 250 characters.
Changing the capacity unit resets an incompatible value to that unit's default. The increment and decrement controls automatically move between 512 MB, 1 GB, 999 GB, and 1 TB at the unit boundaries.
You can increase a share storage's capacity later. Start with the capacity you need now and expand it as your storage requirements grow.
Auto cleaning
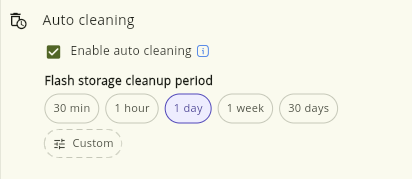
Enable Auto cleaning to remove files automatically after the selected Flash storage cleanup period.
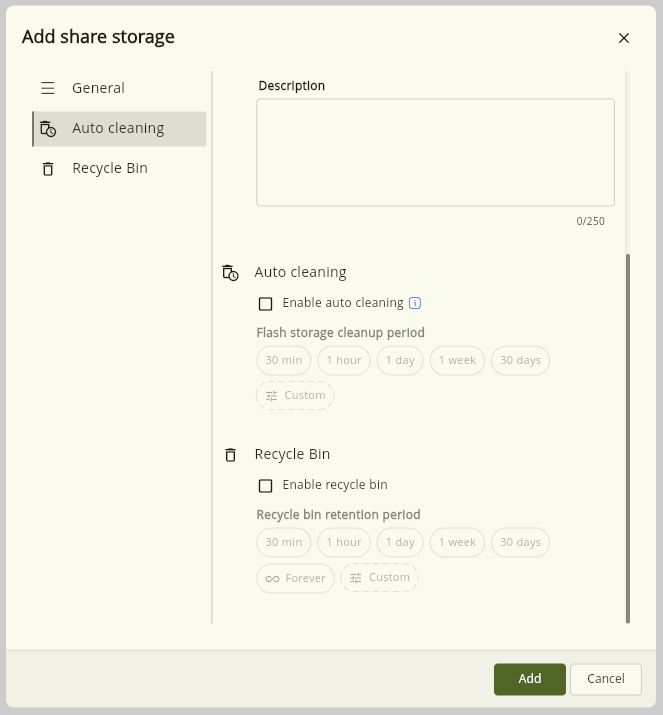
You can select 30 min, 1 hour, 1 day, 1 week, or 30 days.
The initial cleanup period is 1 day when automatic cleaning is enabled for the first time.
Select Custom to specify a duration in days, hours, and minutes.
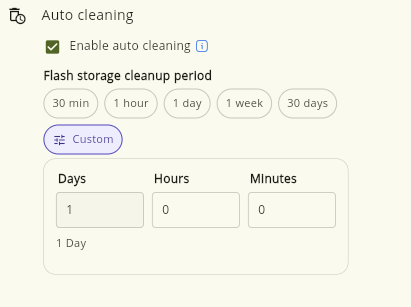
For a custom duration, enter at least one minute. The accepted ranges are 0–365 days, 0–23 hours, and 0–59 minutes.
The cleanup timer is tracked separately for every file. Moving or renaming a file resets only that file's timer; other files keep their existing timers.
Disabling automatic cleaning stops expiration and preserves the last selected period. If you enable it again before closing the dialog, the previous period is restored.
Recycle Bin
Enable Recycle Bin to retain deleted files .
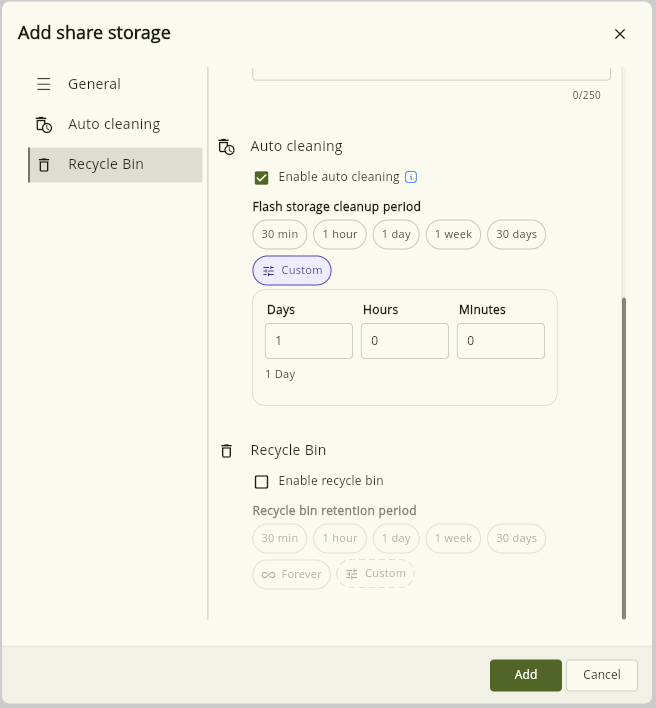
Select 30 min, 1 hour, 1 day, 1 week, 30 days, or Forever.
The default retention period is 1 day.
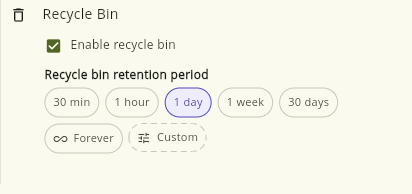
Select Custom to specify the retention period in days, hours, and minutes.
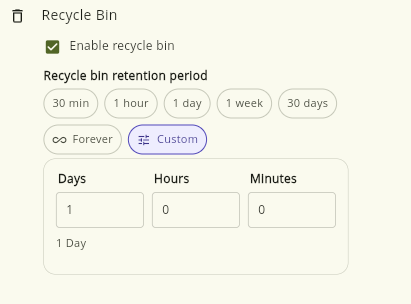
For a custom retention period, enter at least one minute. Select Forever to retain deleted files permanentlly.
Automatic cleaning and the recycle bin are independent policies. Review both periods before creating the share storage so that files are handled according to your needs.
After completing the configuration, click Add.
Add share storage for multiple users or groups
Select Create > Multi add when more than one share storage with same configuration must be created for several identities.
The Multi add Share storage dialog contains the following sections:
General
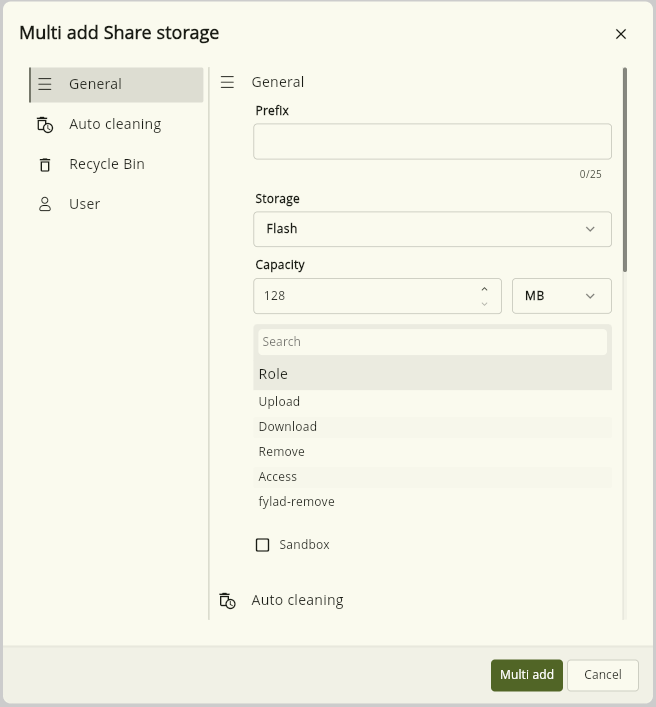
- Prefix: Enter an naming prefix (optional) of up to 25 characters for the generated share storages.
- Storage: This filed show all flash type storages. Select the storage that you want to provide your share storage space. The first available storage is selected by default.
- Capacity: Set the capacity applied to every generated share storage. The supported values are the same as for a single share storage.
- Role: Search for and select one or more roles to assign. Role selection is optional.
- Sandbox: Enable sandbox protection for every generated share storage.
Auto cleaning and Recycle Bin
Configure these sections in the same way as for a single share storage. The selected cleanup and retention policies apply to every share storage created by the operation.
User
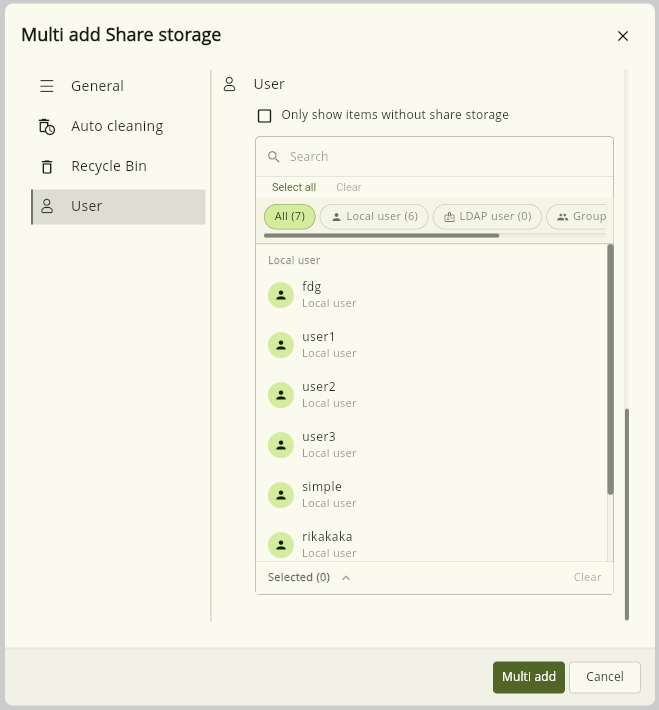
Select at least one local user, LDAP user, local group, or LDAP group.
When Only show items without share storage is enabled, any currently selected identity that already has share storage is removed from the selection.
Click Multi add to create share storage for all selected identities.
Edit a share storage
To change an existing share storage, select it in the table and click Edit.
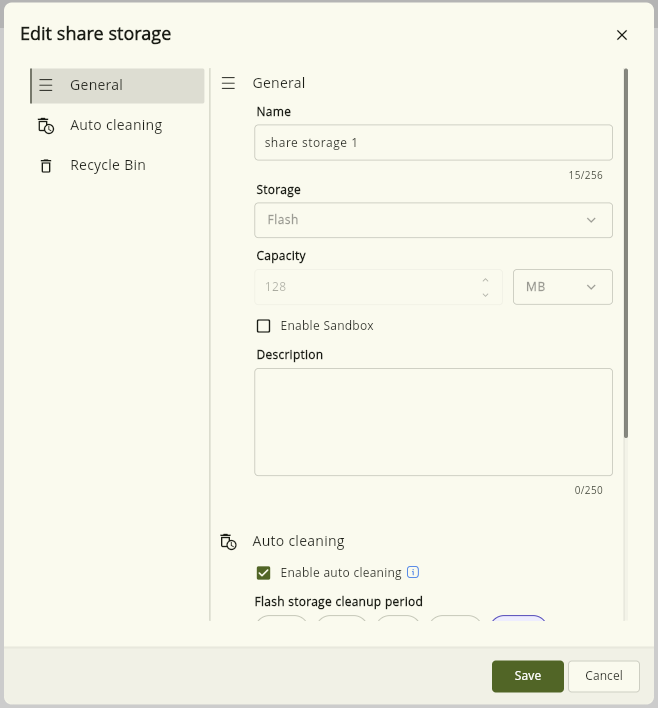
You can update its name, description, sandbox setting, automatic cleaning policy, and recycle bin policy.
The Storage cannot be changed after creation.
The existing automatic cleaning and recycle bin settings are loaded into the dialog. Change either policy using the same presets and custom-duration controls available during creation.
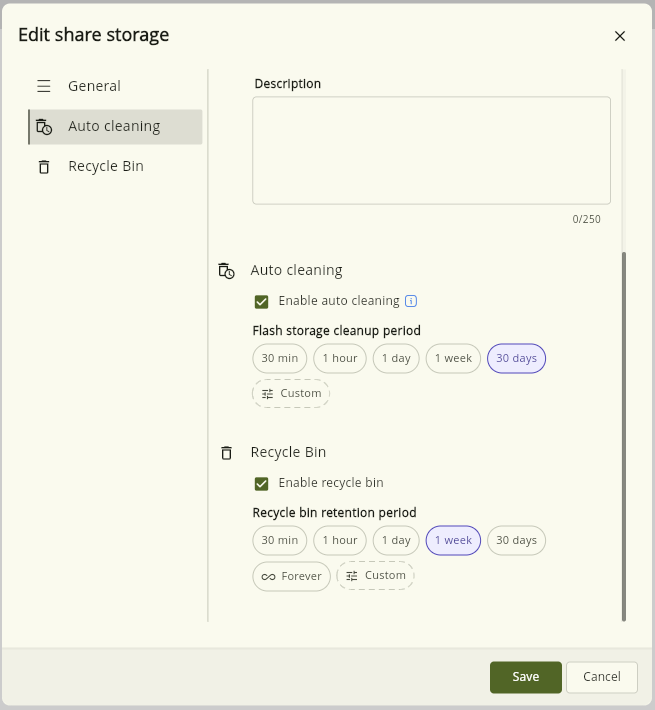
Click Save to apply the changes.
Edit multiple share storages
To apply the same policy changes to multiple share storages, select the required rows, open the context menu, and select Edit. The Multi edit dialog opens with all change options disabled.
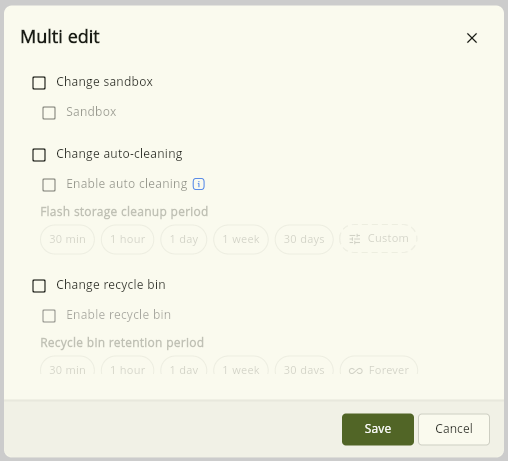
Enable one or more of the following change options:
- Change sandbox: Activates the Sandbox checkbox. Select or clear Sandbox to enable or disable it on every selected share storage.
- Change auto-cleaning: Activates Enable auto cleaning and the cleanup-period controls. Clear Enable auto cleaning to disable automatic cleaning, or select it and specify a preset or custom cleanup period.
- Change recycle bin: Activates Enable recycle bin and the retention-period controls. Clear Enable recycle bin to disable the recycle bin, or select it and specify a preset, custom, or Forever retention period.
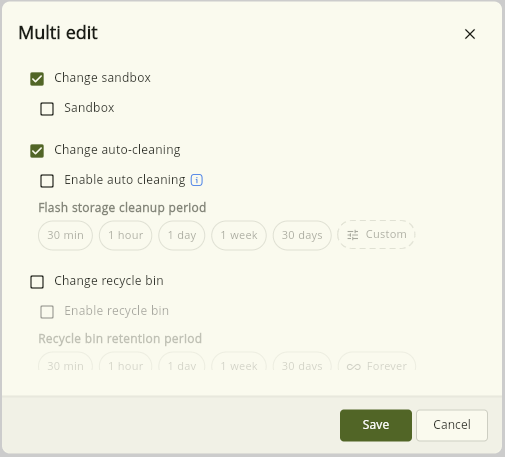
Only settings whose Change... option is selected are applied. All other settings keep their current values on each selected share storage.
Click Save to apply the enabled changes to all selected share storages.