Guide to Closing a Ticket by a Client Organization User
After resolving the issue or receiving the final response, the user who submitted the ticket can close it. Closing a ticket changes the request status to Completed and informs the system that handling this request has concluded.
This guide explains under what conditions an organization user is permitted to close a ticket, where the close option is located, and what changes occur in the ticket status after closing.
Who Can Close a Ticket?
An organization user can only close a ticket when they are the requester and submitter of that same ticket.
A managerial role in the organization alone does not grant permission to close a ticket submitted by another person.
| User Status | Can Close Ticket |
|---|---|
| User created the ticket themselves | Yes |
| Another user created the ticket | No |
| Organization Manager or Owner is not the ticket requester | No |
The primary criterion is that the current user must be the ticket requester.
If you do not see the Close Ticket option, first check the Ticket Submitter section. The ticket may have been created by another user, or your account may lack the required permissions.
Before Closing a Ticket
Before closing the request, verify the following:
- The issue is completely resolved.
- You have read the specialist's final response.
- If the specialist requested additional information or test results, you have sent them.
- No additional files or supplementary documents remain for further review.
If you still have questions or issues regarding the same subject, first send a message in the ticket conversation and do not close it until receiving the final response.
Step 1: Open the Ticket
From the system menu, go to the Tickets section and open the ticket you submitted yourself.
In the details column, check the Ticket Submitter value. The displayed name must belong to your current user account.
Step 2: Displaying the Close Ticket Option
At the top of the details section, click the three-dot button (...). The Close Ticket option will then be displayed.
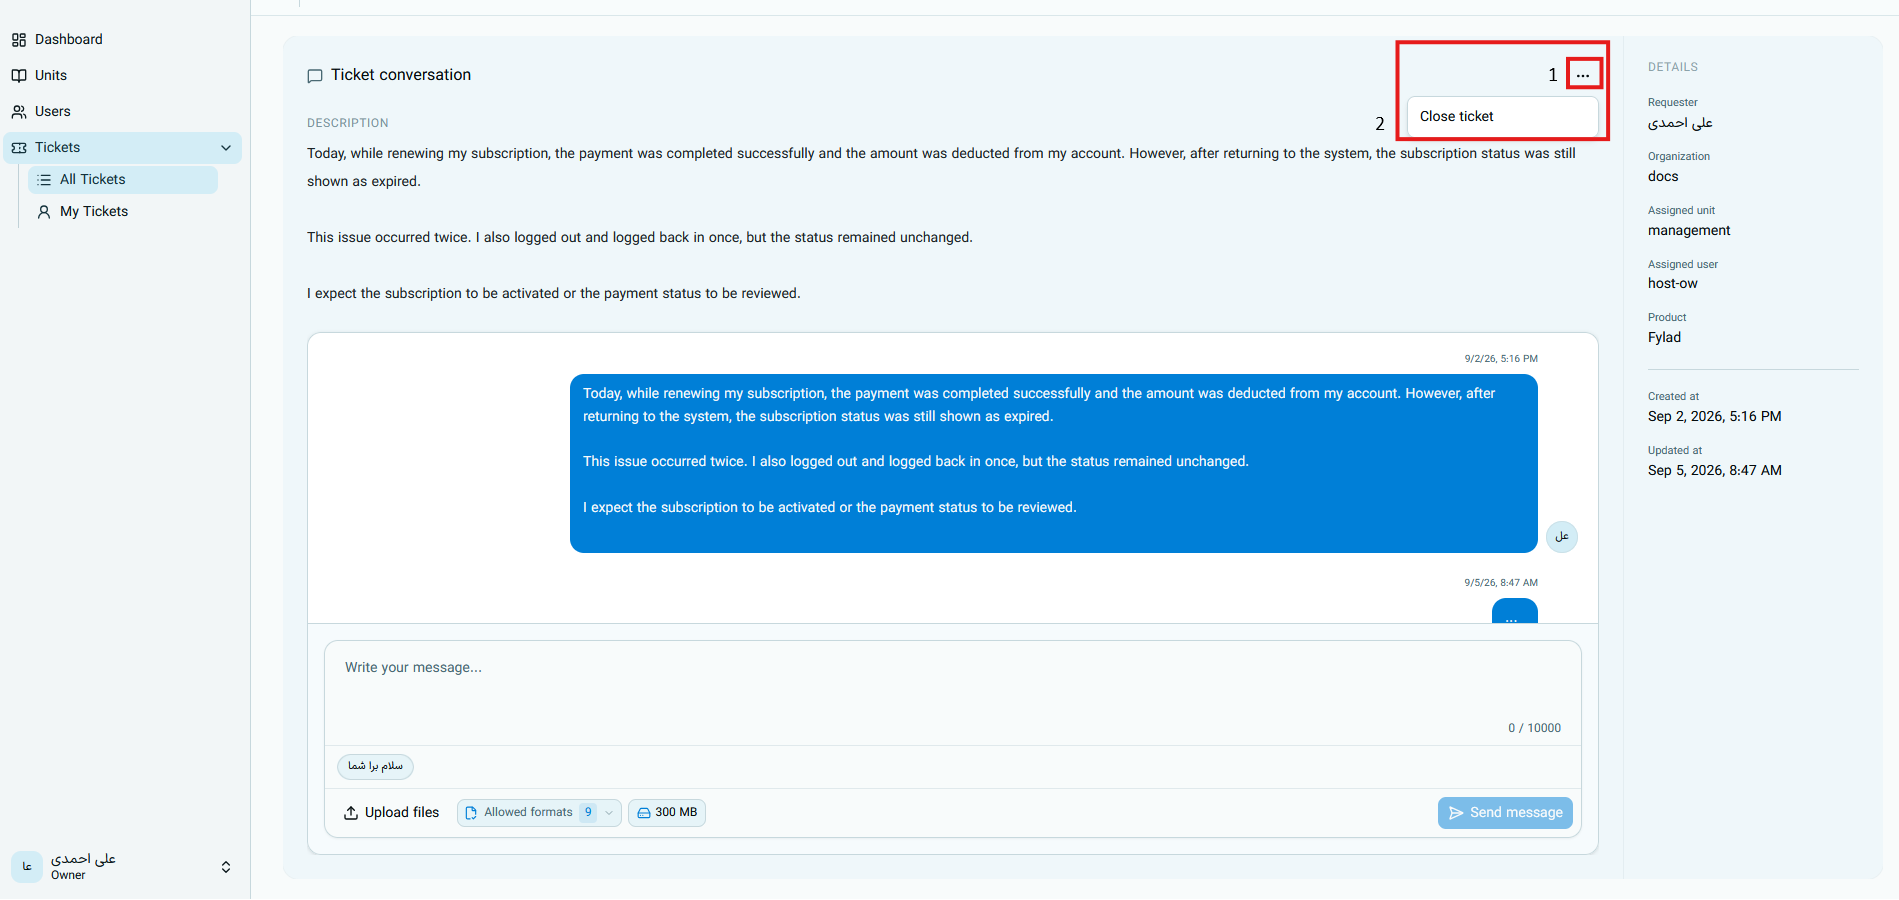
In the image above:
- The three-dot button opens the ticket actions menu.
- The Close Ticket option is used to end the handling process.
The display of this option depends on the user's access level and whether they are the requester. A client user who is not the ticket requester should not have access to this option for that ticket.
Step 3: Close the Ticket
After ensuring the issue is resolved, select the Close Ticket option.
After successfully completing the operation:
- The ticket status changes to Completed.
- The ticket's update timestamp changes.
- Users related to the ticket can receive a closure notification.
- The ticket's title, description, messages, and files are not deleted.
Step 4: Verify the Completed Status
After closing the ticket, return to the Tickets list page. In the Status column, a green Completed label is displayed for the ticket.
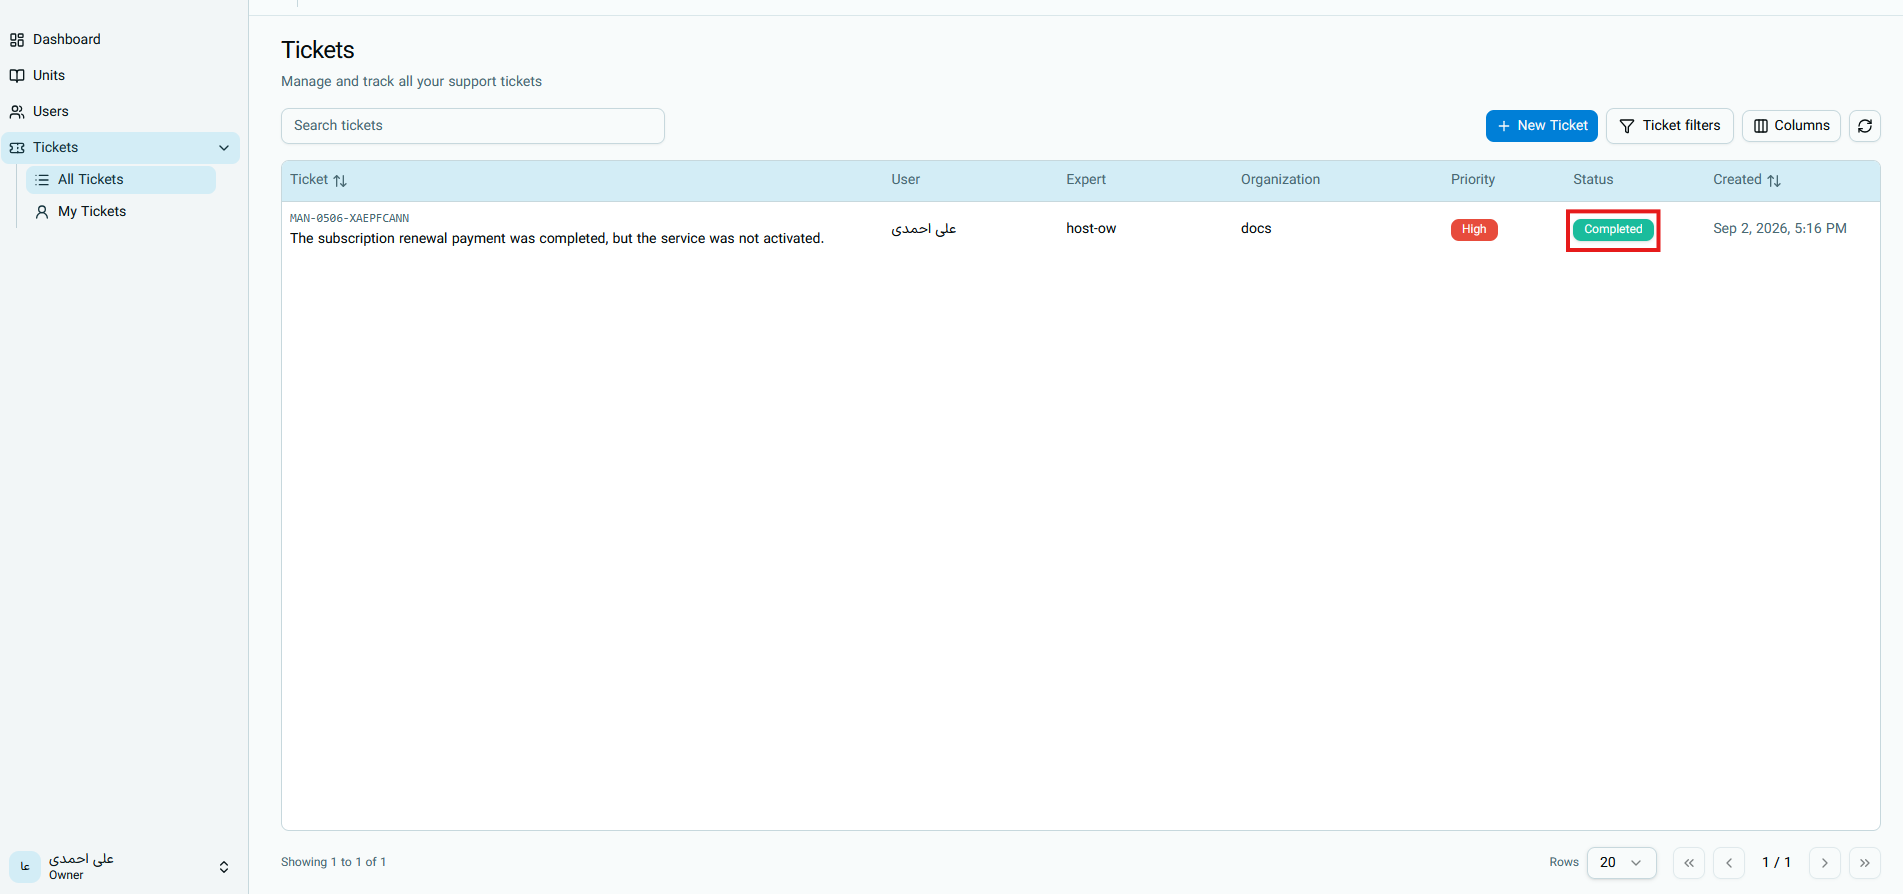
The appearance of this status indicates that the closing operation was successful and active handling has ended.
If the status does not change immediately, click the Refresh button on the tickets page. If the previous status is still displayed, reload the page and avoid submitting the action multiple times.
If You Closed the Ticket by Mistake
Closing a ticket does not erase the conversation history. If the ticket chat is still active and the same issue persists, send a message in that same conversation. Your message can change the status back to Waiting on Specialist.
If sending a message is not possible or the status does not change, contact the system administrator or support team and provide the ticket ID.
After fully resolving the issue, close the ticket so that the active request list remains accurate and the support team knows that no further handling is required for this matter.